First Time Hawaii Itinerary

Hawaii is made up of 137 breathtakingly beautiful islands, and it’s still growing! It’s no surprise that there’s a lot to see and do, which may make organizing a vacation difficult. You could spend a lifetime simply touring the seven inhabited islands and yet only touch the surface.

So, how can you make the most of your seven days in Hawaii? Take a look at this Hawaii itinerary for a week!

Itinerary for Day 1 in Oahu

There is no better way to spend your first day in Hawaii than by immersing yourself in the culture.

Some of the employees at the Outrigger Reef Waikiki Beach Resort can teach guests how to make lei.

All of the materials are included, so you may build your own lei while learning about its cultural significance to Hawaiians.

Make your way to the Polynesian Cultural Center after that.

The trip that includes the luau and the night performance is a bit pricey, but I strongly suggest it.

The Polynesian Culture Center is a location dedicated only to the preservation of the Polynesian countries‘ varied traditions and customs.

Six separate “villages” make up the center, each with different presentations and activities to assist visitors learn about their own cultures.

You may enjoy delicious, traditional Hawaiian food at the luau, and you can watch all of the villages join together to display their abilities and customs at the nighttime entertainment.

Itinerary for Day 1 in Oahu

Read: Is Traveling A Hobby? The Ultimate Guide To An Exciting Way Of Life

Learn about Reasons why traveling is A hobby

Itinerary for Day 2 in Oahu

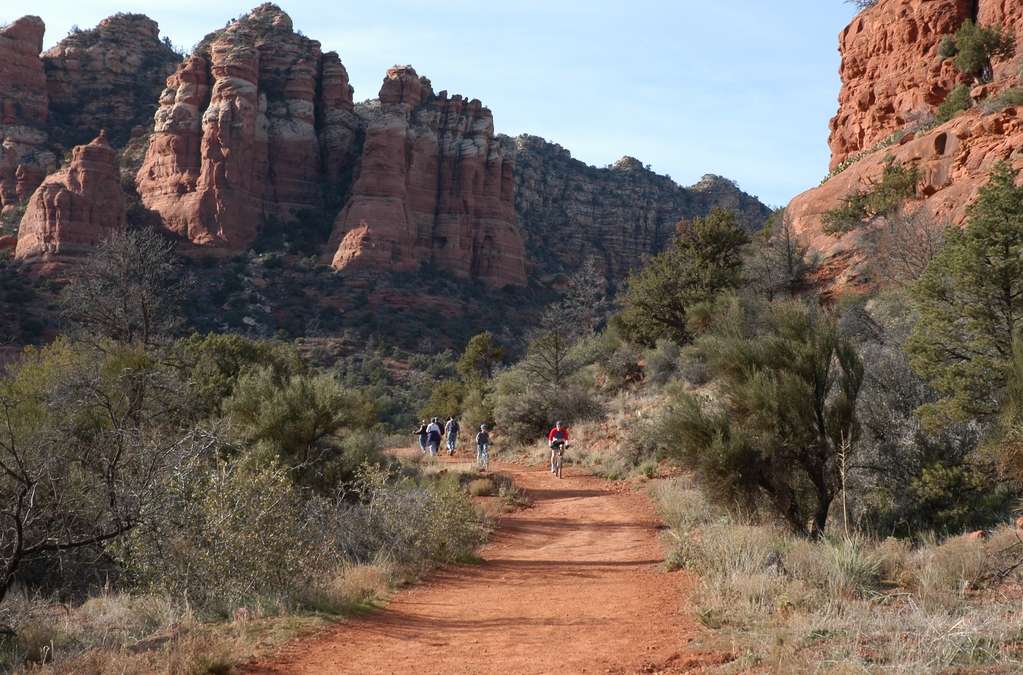
Despite its popularity as a tourist destination, Diamond Head remains a must-see on every Hawaii itinerary.

Despite the history around it, it provides beautiful views of the bright blue ocean and Honolulu’s busy metropolis.

Although the trek to the summit of Diamond Head is only 0.8 miles long, it is steep and requires several stairs.

Arrive early in the morning because the parking lot will most certainly fill up after 8 a.m.

If the parking lot is full, you’ll have to park lower down and then climb up to the park entrance, adding to your already difficult hike.

If you’re a history buff or just a lover of the TV program Hawaii Five-O, pay a visit to King Kamehameha’s renowned statue (frequently shown in various scenes of Hawaii Five-O).

Hawaii was founded as a monarchy by King Kamehameha, who is credited with unifying all of the Hawaiian Islands into a single country and putting an end to the strife that had existed between them.

Iolani Palace, the monarch family’s royal palace, is located across the street from the monument.

Spend the afternoon resting on the renowned Waikiki beach.

Although it will most certainly be crowded, you should be able to locate a quiet area on the sand to sit and rest.

It’s a must-see beach if you’re visiting Hawaii for the first time.

If you’re feeling very sentimental, try writing something unforgettable on the sand before the sea rises and wipes it away!

Itinerary for Day 2 in Oahu

Read: The 19 Best Golf Courses In Hawaii

Itinerary for Day 3 in Oahu

Day 3 of this Hawaii schedule appears to be jam-packed with activities at first appearance, but it is readily doable even at a leisurely pace.

However, because it’s another early morning, make sure you get to bed early!

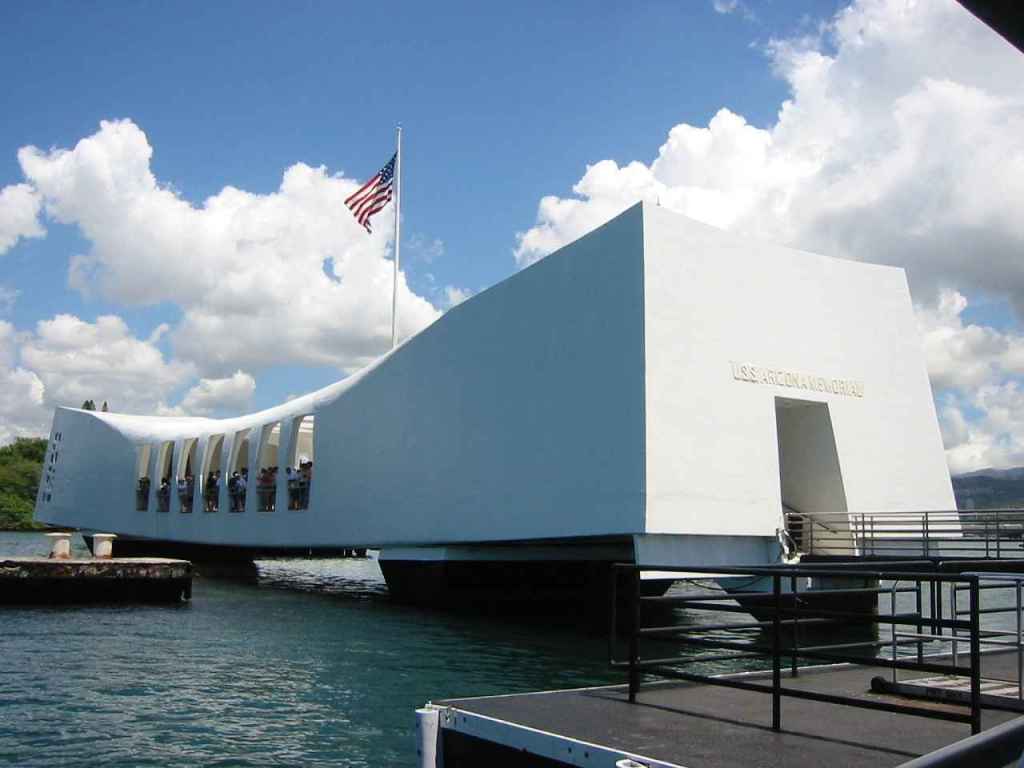
If only for the historical significance, Pearl Harbor is another must-see location on a Hawaii itinerary.

The attack on Pearl Harbor was the catalyst for the United States’ entry into World War II, and its historical significance makes it fascinating even to people who aren’t particularly interested in history.

A tour of the USS Arizona, the primary attraction at Pearl Harbor, is free but requires a ticket (as they limit the number of entries per day).

Tickets may be reserved in advance, but they are rapidly snapped up.

Don’t worry if you weren’t able to get a ticket.

Daily, 1,300 walk-up tickets are available.

However, seats are available on a first-come, first-served basis, so arrive early to secure a seat.

If you’re particularly interested in history, the USS Bowfin Submarine Museum & Park, the Battleship Missouri Memorial and Pacific Aviation Museum, and guided tours of the USS Missouri are among the major attractions in Pearl Harbor.

Go visit the Dole Plantation if you haven’t already.

Dole Plantation is a fantastic destination for people of all ages, even if it doesn’t seem thrilling at first.

The estate’s garden is home to numerous unusual tropical flora, as well as several educational panels to assist you understand more about the plantation and its history.

If you have good directional abilities and love being lost, you can try to navigate the pineapple, which is one of the world’s largest permanent mazes.

When you’ve had your fill of meandering around the maze, take a ride on the pineapple express train excursion.

There’s no better way to unwind after a long day than on the beach.

Instead of Waikiki, travel to Lanikai Beach, which is often recognized as one of Oahu’s greatest beaches.

The beautiful white sand beach and infinite blue sea remind you why so many people refer to Hawaii as “paradise.

” While I recommend three days to explore Oahu, you could easily spend months there! But first, let’s go to the next island.

Itinerary for Day 3 in Oahu

Read: Cheapest Time To Go to Hawaii (Cheap Flights Hotels & Activities)

Day 4 of the Kauai Itinerary

You could easily spend a week on Kauai if you enjoy simply relaxing on a busy beach or going on exciting treks.

Kauai, on the other hand, can be visited in a single day if you want to experience the finest of Hawaii in a week.

Make sure you book an early flight to Kauai with Hawaiian Airlines, and have a rental vehicle reserved and ready to go so you can get started right away.

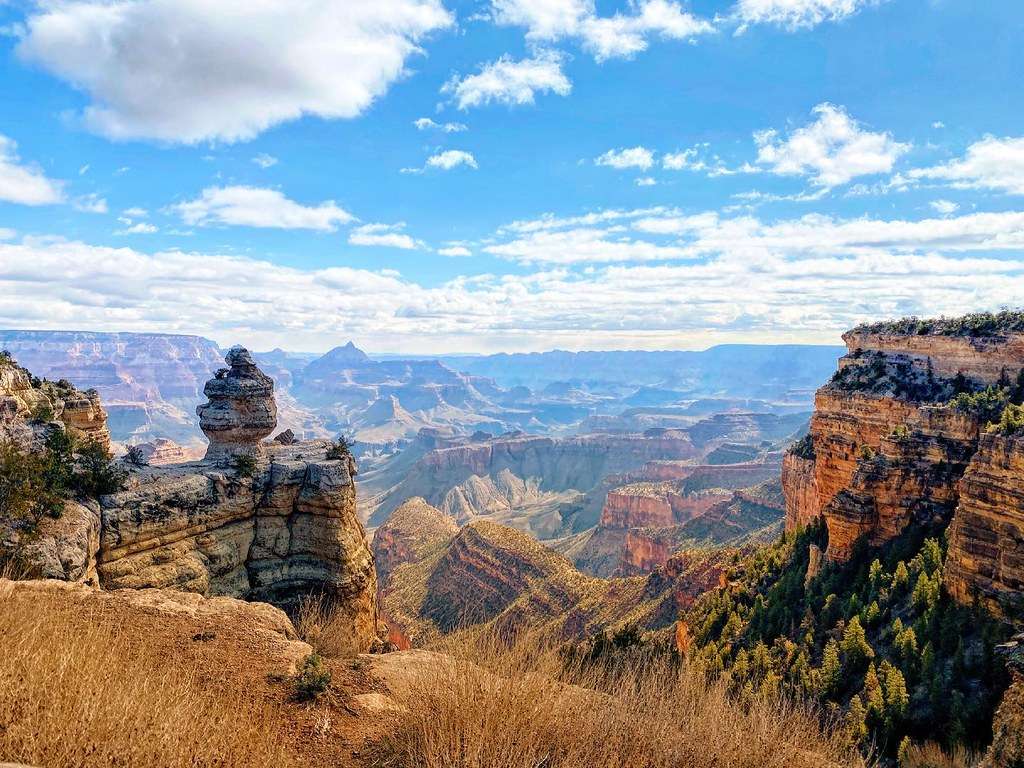
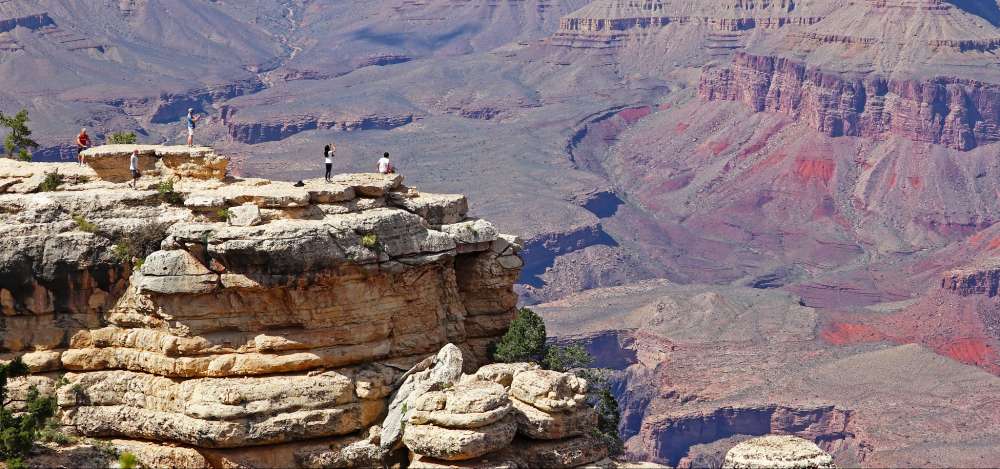
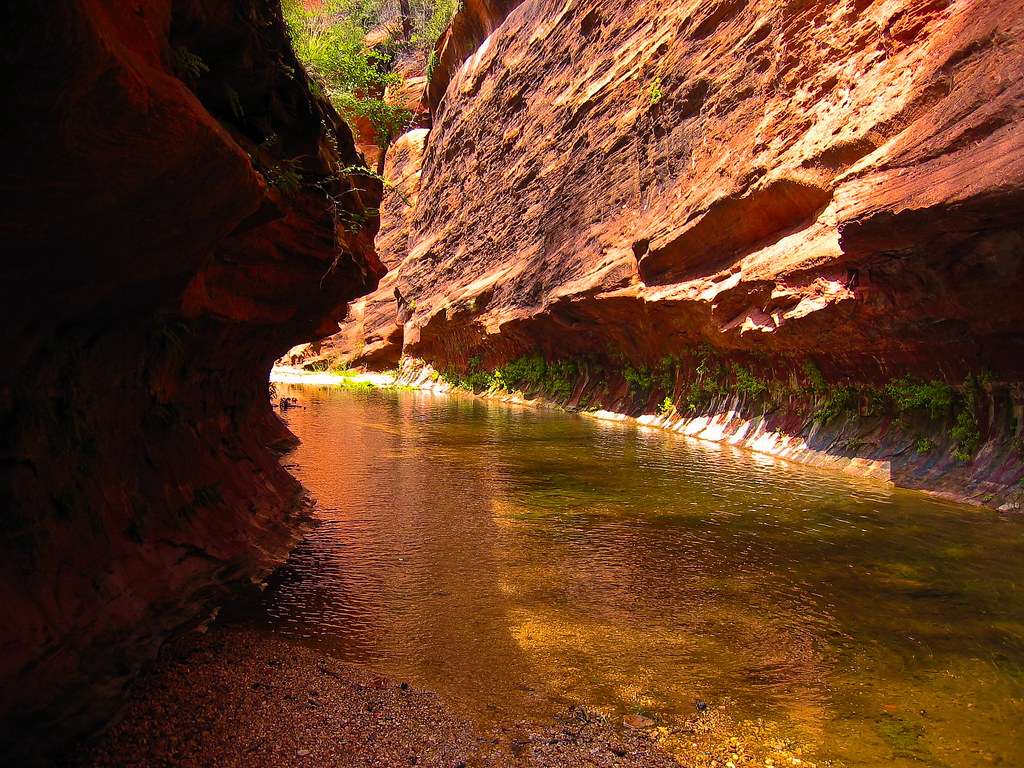
Waimea Canyon is a must-see if you have some free time before or after the trip.

Unlike some canyons that have a desert feel to them, this one is extremely colorful with its red, brown, and green hues.

Visit one of the viewing spots for a nice perspective from the top of the 3,600-foot-deep canyon, and you could even catch a rainbow over one of the numerous waterfalls.

If you have more time, it’s worth staying and learning about Kauai’s culture and mythology, as well as hiking the Kalepa Ridge Trail.

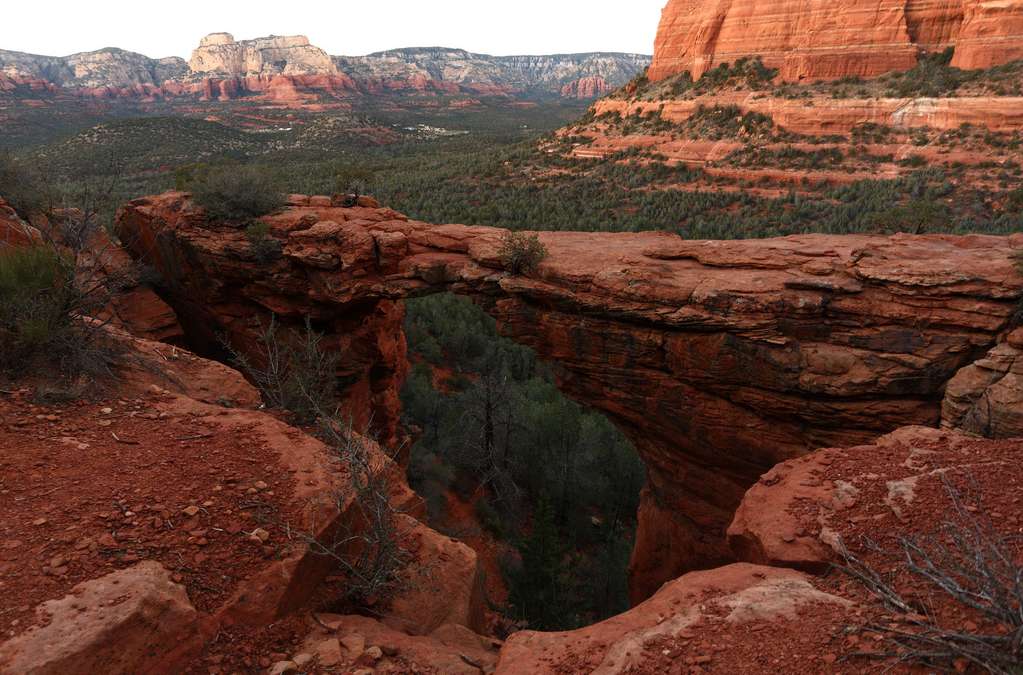
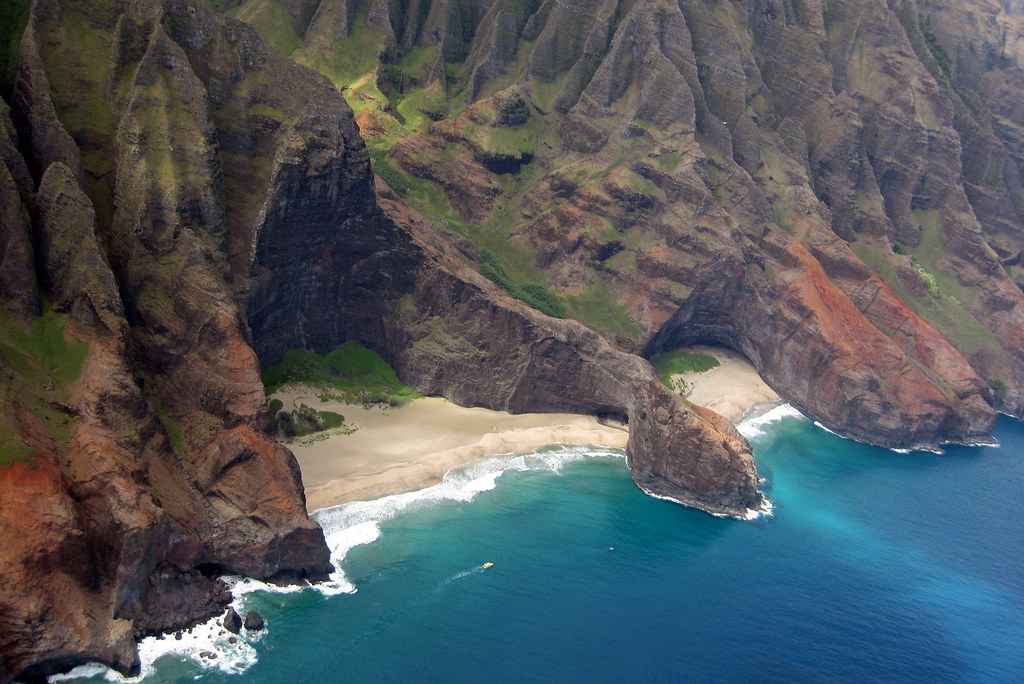
Kauai is famed for its Na Pali Coast, which has some of the world’s highest sea cliffs.

If nothing else, a trip with the Na Pali Experience will provide you with spectacular views of the towering cliffs.

If the water isn’t too rough, most tour organizations will even take you into several of the sea caves.

You can go snorkeling near some of the major reefs at the conclusion of the cruise, and if you’re lucky, you could even spot dolphins or sea turtles.

Day 4 of the Kauai Itinerary

Read: The 19 Best Golf Courses In Hawaii

Day 5 of the Big Island Itinerary

Depending on how severe the seas were on your Na Pali trip, you might want to take a day to relax and recover.

Even those who do not typically get motion sickness felt a little seasick the next day.

Catch a trip to Hawaii’s island (commonly referred to as “The Big Island” to avoid confusion with the state of Hawaii) and pick up another rental car near Kona airport in the morning.

Because the Big Island is the largest of the Hawaiian Islands (surprise!), you’ll need a car to travel around.

There are several amazing Hawaii tree homes on the Big Island, and you should certainly consider staying in one during your visit.

Consider booking a submarine trip with Atlantis Adventures if you don’t get claustrophobic.

Once on board, take a seat in front of one of the submarine’s many porthole windows, then sit back and relax while it glides through the ocean’s depths.

It reaches depths of around 110 feet and provides views of the diverse sea species that make Hawaii home, as well as some of the shipwrecks that have been discovered nearby.

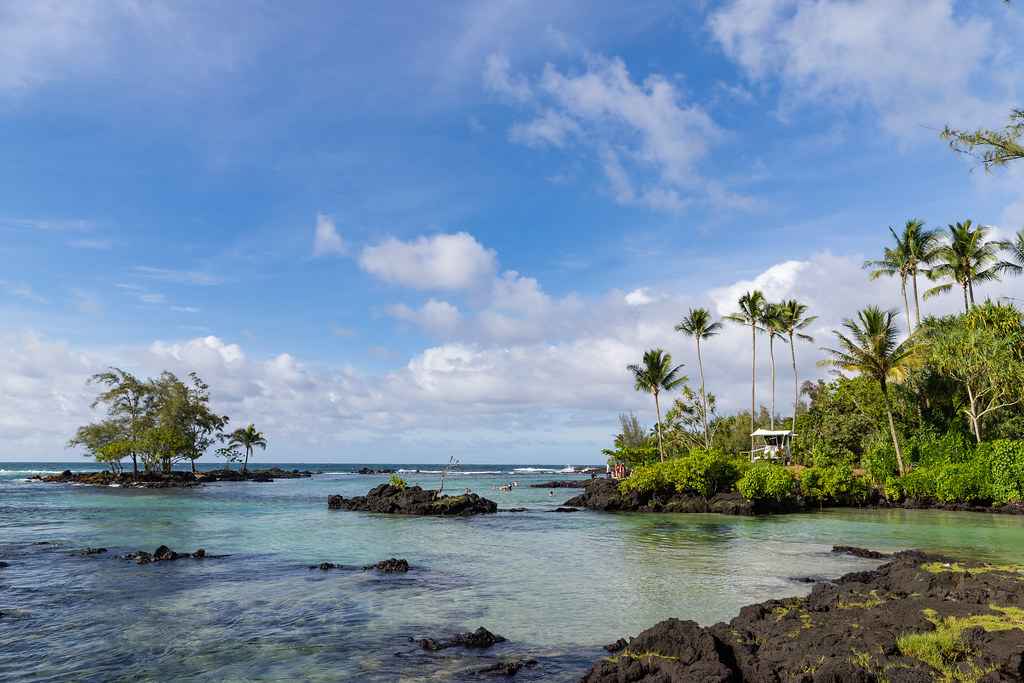
Proceed to Punalu’u Beach, commonly known as Black Sand Beach, after the trip.

The black hue originates from lava pieces from a neighboring volcano, and it contrasts well with the ocean’s gorgeous blue.

Check ahead of time to check if swimming is allowed, as the currents may be extremely strong at times.

Day 5 of the Big Island Itinerary

Day 6 of the Big Island Itinerary

If you’ve never seen a volcano up and personal, a visit to Hawaii Volcanoes National Park is a must.

I just spent an afternoon at the park, but I regret not dedicating a whole day to seeing everything it has to offer.

The Crater Rim Drive Tour and Chain of Craters Road are two of the park’s primary self-guided driving excursions.

I recommend doing both if you have the time, since each has its own set of attractions to see.

The Jagger Museum (which overlooks the current eruption within Halema’uma’u crater), strolling through lava tubes (a tunnel formed by streaming lava), and other attractions may be found along the driving excursions.

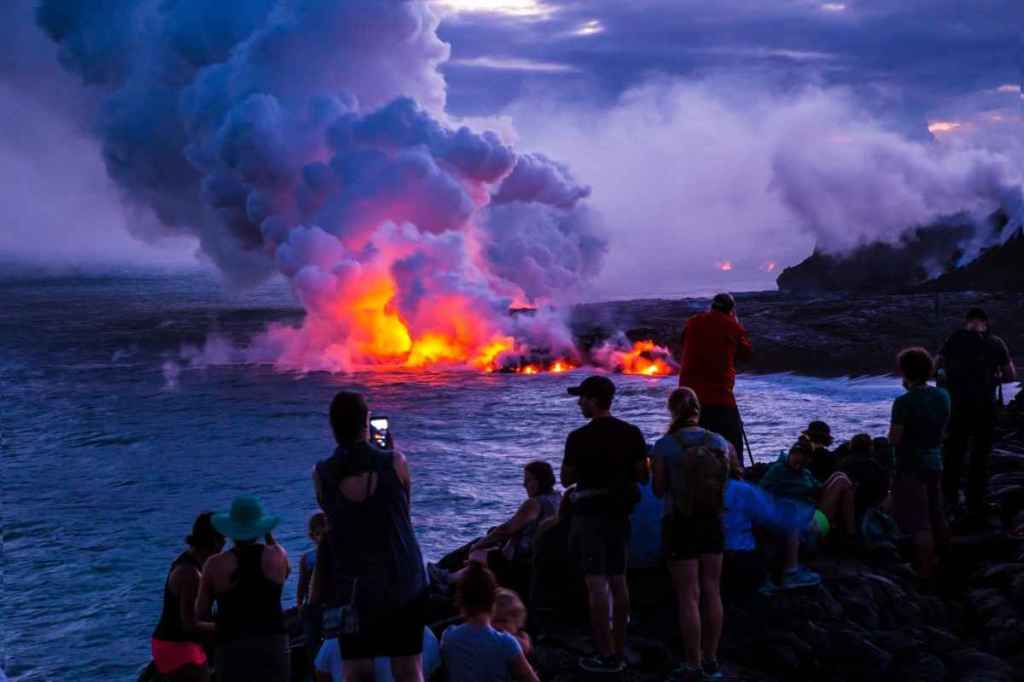
You can undertake the lengthy trip to witness surface lava if you’re feeling brave.

It’s a 10-mile round trip trek that includes half a mile of boulder-sized lava rock, so it’s not for the faint of heart.

How many individuals, on the other hand, can claim to have seen lava up and personal? Make sure you’re prepared if you decide to take on the task.

Bring a full bottle of water and comfortable sneakers.

Bring a heavy-duty flashlight if you plan on going at night (it’s extremely fascinating to see the lava lighted up on the slope at night).

The flashlight on your phone will not suffice.

Day 6 of the Big Island Itinerary

Day 7 of the Big Island Itinerary

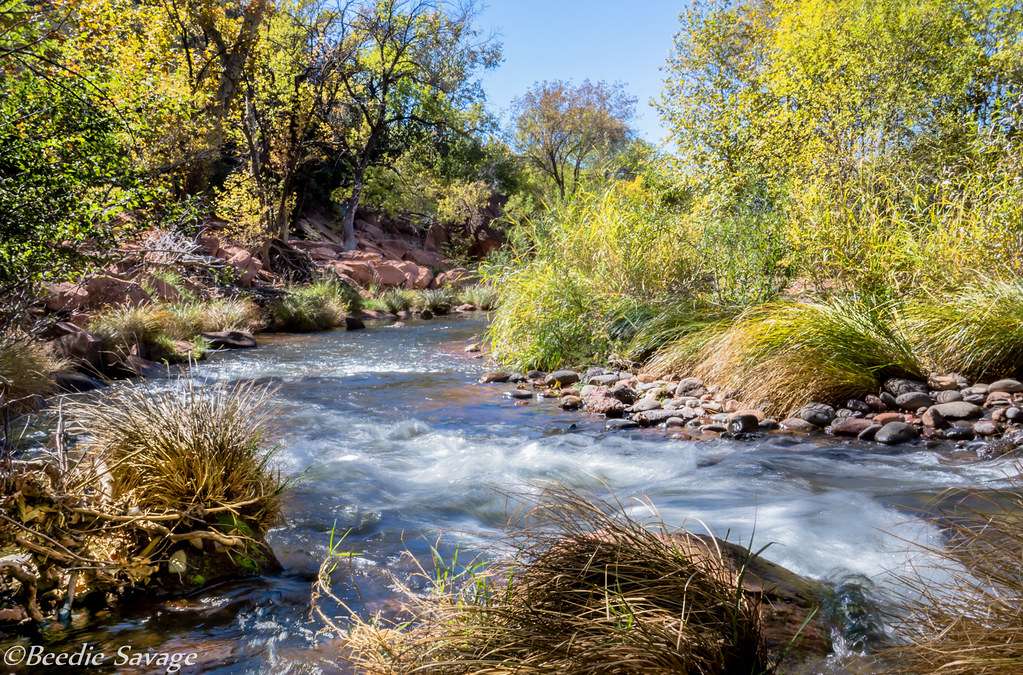
Rainbow Falls is well worth a visit, and it’s close enough to Hilo that it won’t get in the way of your day’s activities.

The magnificent waterfall cascades down the edge of a cliff and into a huge crater.

You can view the waterfall from the parking lot by standing at the railing.

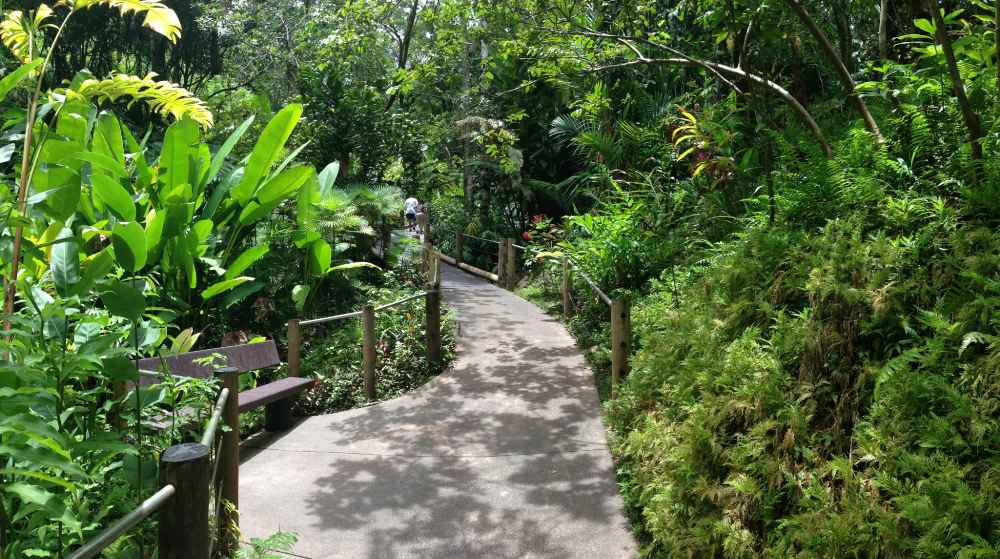
Then walk the short route to the top of the waterfall for a look. Make one final trip at the Hawaii Tropical Botanical Gardens before boarding your flight home.

The garden features stunning coastal vistas, an amazing waterfall, and over 2,000 plant types.

Day 7 of the Big Island Itinerary

Important tips to keep in mind as you explore Hawaii

Now you know how to spend a week in Hawaii.

However, you should also keep few important tips in mind, especially when you are visiting there for the first time.

Let’s take a look at the most important tips that you need to keep in mind.

  • Hawaii is a secure location. Take this list with a grain of salt; it’s not a must-do list. These are suggestions from friendly locals to help you acquire a sense of the culture and become an inquisitive tourist. I wish I’d brought this list with me on my first several trips to Hawaii.
  • At the Hawaii Vacation Guide, we always recommend travelling with Aloha, and this list will help you make the most of your Hawaii schedule.
  • Costco is a great place to get pineapples. At $3 per, Costco boasts the cheapest pineapples on the islands.
  • Hawaii has a high cost of living. If you live in a condo, you can get your goods from Costco. Target and Walmart are the next cheapest options. Safeway is the cheapest grocery shop in town. Check out our guide on finding low-cost foods.
  • Please don’t harm Hawaii’s sea turtles, sleeping monk seals, coral, or other animals. Hawaii’s wildlife is endangered or threatened, so keep an eye out but don’t bother them.
  • Wear sunscreen that is reef-safe. In January 2021, it will become law. For information on what to purchase and where to get reef-safe sunscreen on the mainland and in Hawaii, read Hawaii Reef-Safe Sunscreen.
  • Aloha Shirts, not Hawaiian Shirts, are what they’re called.
  • If you bring lava rocks and sand to Hawaii, you will be cursed by Pele.
  • Don’t blare your horn. On the islands, people drive slowly, so mentally prepare yourself to drive with aloha.
  • Don’t leave valuables in your car or on the beach unattended.
  • lease remove your shoes and leave them at the door. The pile of slippers will be seen (aka, sandals). Place yours on top of the pile.
  • Try some of the local cuisine. Poke, musubi (rice and spam wrapped in seaweed), malasadas, a meal at a food truck with local grindz, a cup of peaberry Kona coffee, and a visit to McDonald’s to view the Hawaii menu
  • Don’t go near the coral reefs. To remain afloat, use a noodle.
Important tips to keep in mind as you explore Hawaii

Final Words

By following this itinerary, you can get the most out of time that you are spending in Hawaii. There is no need to worry about following this itinerary and enjoying your time in Hawaii.

[9 Best] Hikes In Everglades National Park

The hiking paths in Everglades National Park are one-of-a-kind. I’ve visited numerous National Parks across the world, and every now and then, some surprisingly stunning place blows my expectations out of the water. Hiking paths in the Everglades range from tiny informative trails to lengthy day treks. Everglades National Park is in Florida, in the United States’ southernmost state. This Park is jam-packed with excitement, the greatest treks, wildlife, and one-of-a-kind creatures, and it’s a must-see for everyone visiting Florida.

In the Everglades, elevation is usually measured in inches rather than feet.

The park’s greatest height is just 8 feet, so seeing this elevation marker at 4 feet made me giggle a little.

From the lowest freshwater marsh to the highest tropical hardwood hammocks, the park’s elevation levels characterize each ecosystem.

Everglades National Park's Most Popular Trails

Read: Is Traveling A Hobby? The Ultimate Guide To An Exciting Way Of Life

Learn about Reasons why traveling is A hobby

1. Anhinga Trail

This self-guided route runs through a sawgrass marsh, where you could encounter alligators, turtles, anhingas, herons, egrets, and a variety of other species, especially in the winter.

Because of the abundance of animals, this is one of the park’s most popular paths.

As you enter the park from the east entrance, the first trailheads you’ll see are Anhinga and Gumbo Limbo.

The Anhinga path is the finest trek we found in the Everglades.

The boardwalk route runs through the sawgrass marsh and is the greatest trail in Everglades National Park for animal viewing.

Alligators, egrets, anhingas, herons, turtles, tropical colored birds, and a variety of unusual fish were among the animals we observed.

The Anhinga path has a lot of traffic and may get fairly congested, although we never felt cramped.

Anhinga Trail

Read: Mt. Moosilauke Winter Hike (What to expect)

Learn about the Mount Jim Ridge trail

2. Gumbo Limbo Trail

We moved on to the Gumbo-Limbo path after finishing the Anhinga trek.

You’ll enter a deep tropical hardwood hammock after a brief 0.4 mile trek.

The route winds through a tropical hardwood hammock, a world far apart from the slough’s open expanse.

Plants appear to be all identical in the dark tangle of greenery, and animals appears to be non-existent.

The route was not overcrowded, and it provided a welcome reprieve from the hot heat of the Anhinga trek.

Only the tropical climate allows forests like these to exist. Around 700 of the park’s 700 native plant species are tropical in origin.

Gumbo Limbo Trails is a moderately difficult trek.

The round trip distance is 4 miles. This path is wheelchair accessible as well.

A wonderland of gumbo limbo trees, royal palms, ferns, and air plants awaits you on the route.

As you travel along, you’ll come upon a short boardwalk.

When the route comes to a conclusion, you’ll emerge from the trees in front of the visitor center, which is next to the parking lot.

The hammock is home to a remarkable number of species, each of which takes on its own personality.

The vegetation grows in layers due to the fierce struggle for light and space.

In 1983, a botanist visiting the hammock was so taken aback by the abundance of bromeliads, royal palms, and orchids that he proposed the area be designated as a federal park. It took him three days to get here from Miami.

Gumbo Limbo Trail

Read: 12 Best Washington Spring Hikes To Try Out In [year]

Learn about Hoh Rain Forest Loop trail

3. Pinelands Trail

Take a brief walk through a sub-tropical pine forest on this 0.4-mile route.

You’ll be strolling through one of South Florida’s most varied ecosystems.

As hardwoods give way to young pine, the landscape will change.

Unless they are destroyed by fire first, higher regions in the Everglades eventually become huge hammocks.

Fire is essential to the Everglades’ natural variety and the regeneration process of the different habitats.

In the past, the hammocks of South Florida were home to 52 different color variations of tree snails.

They were scattered from the West Indies and established on different tree islands.

Many multi-colored variants emerged as a result of years of inbreeding.

Collectors would occasionally burn hammocks after acquiring a large number of one kind, eliminating those that remained and increasing the value of their collection.

As a result, at least four species of tree snail have become extinct.

Pinelands Trail

Read: 14 Best Hikes In Denali National Park To Try Out [year]

Learn about The Gorge Creek Trail

4. Pa-hay-okee Overlook

A short stroll will lead you to Pa-hay-okee, a lovely viewpoint.

This freshwater marsh habitat is characterized by a broad, shallow, and slow-moving “river of grass.”

It’s incredible how big this green river of grass was. It looked to stretch towards the horizon indefinitely, with the rare tree growing out of it.

The yearly rise and fall of fresh water is the lifeblood of Everglades National Park, and this river of grass is reliant on it.

It is also reliant on individuals. We dug, dammed, and drained the countryside for almost a century.

The ebb and flow of this life-giving fluid may be controlled. As a result, we put the Everglades and the life that depends on it in jeopardy.

Pa-hay-okee Overlook

Read: [9 Best] Kid Friendly Hikes At Mount Hood

Learn about Laurance Lake trail

5. Mahogany Hammock Trail

This 0.4-mile stroll takes you through an island woodland that seems like it belongs in a jungle.

Everglades National Park is home to tropical hardwood hammocks like the ones shown above.

The hammocks develop out of the freshwater marshes to form thick island woods.

Mahogany Hammock Trail

Read: 8 Best Hikes In Saguaro National Park Rated

Learn about Valley View Overlook Trail

6. Bear Lake Trail

The Bear Lake Trail is a moderately difficult hike that takes you on a historic trip.

Early developers attempted to drain the coastal plains around Cape Sable, and their efforts may be seen along the road.

The Flamingo Visitor Center is where you’ll find the trailhead.

Follow Main Park Road north for 0.5 mile until you reach Bear Lake Road.

Starting at the trailhead, it leads you down a tropical forest-lined corridor to the Bear Lake Canal, a mangrove-lined canal.

Bear Lake’s beautiful sights await you at the end of the journey!

Bear Lake Trail

Read: 10 Kid Friendly Hikes In The Red River Gorge Reviewed

Learn about Tom McCall Preserve trail

7. Christian Point Trail

The Christian Point Trail is regarded as one of Everglades National Park’s most difficult hikes.

This path is not maintained, despite the fact that it is available.

To get to the path, proceed to the Flamingo Visitor Center and then north on Main Park Road for 0.8 mile until you see the Christian Point trailhead on the right.

The journey begins in a mangrove forest before entering a wetland (accessible via a boardwalk).

After passing through the mangrove forest, you’ll come to a tiny prairie that leads to a larger marl prairie.

Snake Bight, a portion of Florida Bay, is located on the other side of this grassland.

As you go on, you’ll pass through a buttonwood and black mangrove forest before seeing views of Snake Bight and the remainder of Florida Bay.

Christian Point Trail

Read: 10 Best Dog-friendly Hikes In Acadia National Park

Learn about Wonderland Trail – 1.6 mile distance

8. Coastal Prairie Trail

The Coastal Prairie Trail in the Everglades is a difficult hike.

Although the path is now available, it must be walked with caution and care because it is poorly maintained.

There may be plants or other flora and wildlife that will make your hike more difficult.

This walk transports you back in time to when cotton pickers and fishermen utilized this route.

Prairies of succulent coastal plants may be found along the road.

The Coastal Prairie Trail begins at the Flamingo Campground’s Loop “C” and finishes at Clubhouse Beach.

Backcountry camping necessitates the purchase of a permit.

Coastal Prairie Trail

Read: [10 Best] Hikes In Pinnacles National Park

Learn about the Best moderate hikes at the park

9. Nine mile pond canoe trail

There is a canoe trail at Nine Mile Pond.

With a length of 5 kilometers, this circle should take 4 to 5 hours to paddle slowly.

On this route, you may observe alligators, wading birds, turtles, and fish.

Carry rain gear, food, a personal flotation device (PFD) for each canoeist, a spare paddle, and a waterproof gear bag.

Nine mile pond canoe trail

Read: [9 Best] Stroller Friendly Hikes Sedona In ([year]))

Learn about Devil’s Bridge Trail

How to get to the Everglades National Park

Because the Glades are so large, seven airports serve as entry points.

Despite the fact that some take longer to reach than others, none are more than four hours distant (and most much less).

As a result, it’s ideal to combine your arrival city with other activities you might enjoy theme parks in Orlando, nightlife and museums in Tampa and Miami, fine dining, golf, and charter fishing in Sarasota, Fort Myers, and Naples, and Hemingway kitsch, history, and endless margaritas in Key West.

There are three major entrances, four tourist centers, and an information station in the park once you’ve chosen your airport.

On the park’s east side, the Shark Valley and Ernest F. Cole Visitor Centers, as well as the Royal Palm Information Station and Bookstore, are all conveniently accessible from Miami and provide ranger-led activities.

The 45-foot-tall, 360-degree viewing tower in Shark Valley is a popular visit.

The Gulf Coast Visitor Center, located near Everglades City on the park’s west side, is easily accessible from Naples and serves as the finest entrance point for the Ten Thousand Islands region, a birding, fishing, and kayaking paradise.

The Flamingo Visitor Center is located on Florida Bay, at the park’s far southern edge, and may be reached by automobile from Miami or by boat from the state’s east and west coastlines.

It is simple to get here by car. U.S. Route 41 is the only way in from Tampa, Sarasota, Fort Myers, or Naples on the west side.

The major ports of access from Miami are U.S. Route 41 and Florida State Road 9336, which turns into Main Park Road.

Both sides are equally accessible from Orlando.

However, regardless of where you’re coming from, the best way to explore the west coast, where the river of grass meets the sea, is to bring your own canoe or kayak or rent one from the Ivey House in Everglades City.

Keep in mind that the waters are shallow, and the undersea ecosystem is delicate.

You’ll have to get out of your boat and push if you get trapped in the muck, which rips up the underwater seagrass ecosystem.

Use of depth finders is recommended, as is understanding of tides and nautical maps, as well as awareness of endangered manatees.

How to get to the Everglades National Park

Things you can do at the Everglades National Park

The Glades offer a variety of activities for those willing to brave the mazelike waters, tall grasses, and mangrove isles.

Most of the park’s one million annual visitors don’t venture much further than a visitor center walking tour, but for those willing to brave the mazelike waters, tall grasses, and mangrove isles, the Glades offer a variety of activities.

Whatever activity you pick, one thing is certain: you will most likely get wet.

If you’re a birder, there’s no better site in the country to cross off your bucket list than the Everglades, which is home to over 360 different types of birds.

Simply select a bird from your list—for me, it’s always the shy and pink-hued roseate spoonbill—and you’ll see it in the Glades.

For a day excursion or a two-week expedition, launch your canoe or kayak at the Flamingo or Gulf Coast Visitor Centers.

There are 100 miles of linked, aquatic wilderness between the two places, as well as backcountry campsites and a few designated canoe paths to protect you from getting lost.

The 5.2-mile circle around Nine Mile Pond, which passes through grass marshes and mangrove islands, is a popular day-trip destination.

Those who become lost, though, keep park rangers busy with frequent rescues.

You may catch more than 70 different species of fish here, and the first step is to acquire a license from the Florida Fish and Wildlife Conservation Commission’s website (the park itself has some special regulations outlined here).

For freshwater locations, light tackle is sufficient.

I catch a lot of panfish, catfish, and bass using crawlers.

Things you can do at the Everglades National Park

Final words

The state of Florida has a lot to offer visitors. Yes, there are beaches and artistic neighborhoods, but it is natural wonders like the Everglades that will delight you. Biscayne National Park should be on your bucket list if you enjoy eco-adventures. This national park is easily accessible from downtown Miami.

Biscayne is known for its turquoise oceans, green islands, and fish-filled coral reefs, as well as its nautical heritage, which includes pirates and shipwrecks. After the Everglades, you should go to Big Cypress National Preserve. The swamp of Big Cypress is primarily made up of cypress trees (of rainwater). It is also near to Miami, similar to Bisayne.

Before visiting any of the other national parks in Florida, make sure that you go ahead with at least one of these trails. Then you can get the best experience that the park has to offer.

Is Antelope Canyon Worth It?

Antelope Canyon might be a highlight of your Arizona vacation. It’s simple to understand why the Navajo people consider this area sacred because it’s surrounded by red canyon walls sculpted by nature over millennia. Antelope Canyon is a slot canyon formed by flash floods flowing through the sandstone. Water carves a twisting route through the stone, producing circular and wave walls with fine patterns.

A few years back, we went to the canyon. It was one of the more costly activities on our agenda, and I had questioned whether it was worthwhile. That was the case. In this piece, I’ll provide some ideas and recommendations for visiting Antelope Canyon. I hope this information will assist you in making the most of your visit to this magnificent location.

It Is Dangerous to Visit Antelope Canyon During A Flash Flood?

Tours may be canceled without notice if it is pouring upstream.

If this happens, tour providers should return your money, but double-check their website to be sure.

Flooding from flash floods is a major hazard.

People have perished in slot canyons as a result of flash floods.

Unfortunately, Antelope Canyon has claimed its share of life.

I don’t want to scare you away by being sad, but if you’re interested in Antelope Canyon fatalities, you should know that 11 tourists died in the canyon in 1997.

They had no clue a flash flood was approaching since there was no early warning system in place.

The narrative of their guide may be found here. He was the incident’s sole survivor.

Thankfully, things have changed since then.

Visitors are no longer allowed in the canyon when there is a significant flood danger, thanks to the installation of an early warning system.

So, please don’t get upset at them if this occurs to you. Floods are a serious threat.

It Is Dangerous to Visit Antelope Canyon During A Flash Flood?

Read: Is Traveling A Hobby? The Ultimate Guide To An Exciting Way Of Life

Learn about Reasons why traveling is A hobby

The Navajo Tribe Owns Antelope Canyon

Antelope Canyon is sometimes mistaken for a national park.

I can see why. If it hadn’t been on Navajo property, it would very definitely have been a national park.

It’s one of numerous Navajo tribal parks that tribal officials look after.

Oh, and in case you’re curious, here’s the deal: Antelope Canyon is located in Arizona, not Utah.

It’s in the state of Arizona.

I realize this may seem ridiculous, but people Google “Antelope Canyon, Utah,” so it’s worth mentioning.

The Navajo Tribe Owns Antelope Canyon

Read: How To Get To Antelope Canyon

Learn about Where is the Antelope Canyon?

Keep the time zone in mind

During the summer, Navajo territory observes Daylight Saving Time (DST).

The majority of Arizona’s regions do not.

In the Navajo reservation, this implies it is one hour earlier.

Adjust your schedule if you’re visiting Antelope Canyon and arriving from outside the reserve on the same day.

Keep the time zone in mind

Read: Bryce Canyon VS Antelope Canyon ( Pros And Cons For Each ) 

Learn about Why you should go to Bryce Canyon National Park?

The Antelope Canyons are divided into two sections: the lower and upper canyons.

It’s the same canyon, but you may visit it from two different directions: Upper Antelope Canyon and Lower Antelope Canyon.

The upper canyon is the most visited.

The entry point is on the ground level, making it broader and more accessible.

The lower canyon’s entrance is smaller and steeper, and tourists must descend many flights of stairs.

The Antelope Canyons are divided into two sections: the lower and upper canyons.

Only guided tours are permitted to see Antelope Canyon.

Antelope Canyon may only be visited with a Navajo guide, according to Navajo Tribal Parks Authority rules.

Both the Upper and Lower canyons offer guided excursions throughout the year.

You have the option of taking a general tour that lasts approximately an hour or a photographic tour that lasts up to two hours.

All visits are limited to two hours due to park rules.

Only guided tours are permitted to see Antelope Canyon.

Guided Tours of Upper Antelope Canyon

You may visit the upper Antelope Canyon with one of three certified tour companies.

You can be picked up from the town of Page by tour operators, or you can drive to the parking lot closer to the canyon’s southern entrance and be picked up there.

They will then drive you to the start of the trip in their 4WD vehicles.

Guided Tours of Upper Antelope Canyon

Lower Antelope Canyon Tours with a Guide

There are two businesses that offer guided trips to the canyon’s lower reaches.

They are just across from one other, at the canyon’s northern entrance.

Visitors Park their cars in the lot and walk the short distance to the entrance.

Lower Antelope Canyon Tours with a Guide

Entrance Fees to Antelope Canyon

Antelope Canyon is an expensive place to visit.

The guided tour firms charge $40-$50 per person for the tour (discounts are available for minors under the age of 12), plus an extra $8 fee to the Navajo Tribal Parks. In addition, there is a 6% sales tax (collected by the Navajo authorities).

Travel to the lower canyon and begin your tour there if you want to save money.

It will be less expensive than taking one of the trips that take you to the canyon.

Entrance Fees to Antelope Canyon

Be prepared for the worst

You’d think that paying such a high sum would earn you some delicate loving care…

They don’t, though. You’ll be tossed around in a 4WD truck over the desert if you visit the upper canyon.

Pregnant people, as well as individuals with back discomfort or other health problems, should avoid this product.

It’s also a little unsettling for the rest of us.

If you drive to the bottom of the canyon, you must descend (and then ascend) five flights of steps.

This is exactly what we did, and the stairs were no trouble at all.

Before entering the canyon, though, be prepared for a bleak encounter.

Even if you pre-booked your tour, you can plan to wait at least 45 minutes in the Arizona desert heat.

Although there is considerable shade, there is no air conditioning.

The restrooms are also a bit of a letdown.

If you like yours to be clean and contemporary, make sure you have somewhere to go before going on the tour.

Near the bottom antelope canyon, there are restrooms.

Be prepared for the worst

Accommodation options available at Antelope Canyon

Antelope Canyon is located in Page, Arizona, a Navajo reservation community.

Antelope Canyon, Glen Dam, Lake Powell, Rainbow Bridge, and Horseshoe Bend are just a few of the town’s prominent attractions.

Because there are so many tourists in town, lodging is usually costly.

If you don’t book ahead of time, you’ll be stuck with the least attractive locations (and sometimes with none at all).

Here are some decent motel and hotel options in Page, Arizona.

This is Booking.com’s “Bargains Finder,” which ensures you’re viewing the greatest deals in Page.

You’ll need them, believe me.

Accommodation options available at Antelope Canyon

Frequently Asked Questions about the Antelope Canyon

We’ve received a lot of questions from tourists about Antelope Canyon over the years, so I decided to compile them into a FAQ. Let’s get started.

Frequently Asked Questions about the Antelope Canyon

What is the best way to get to Antelope Canyon?

Antelope Canyon is located in Page, Arizona.

It’s about a 10-minute drive from town, and parking is plentiful at the admission booths.

Some tour companies will gladly transport you from Page if you don’t have a car or don’t want to drive your own.

Antelope Canyon is located in the state of Arizona. From the city of Las Vegas

The quickest route from Vegas to Page is to take I-15 to Kanab, Utah.

Because the journey takes around 5 hours, most people intend to spend at least one night in Page.

There’s actually a lot to do there, so if you have an extra day, you won’t be bored.

My advice is to rent a boat and go sailing on Lake Powell.

That was a fantastic experience for my children.

If you have extra time, you may visit the Grand Canyon National Park on your way to or from Page.

This would be a lengthier drive (about 7 hours), but hey, you’re going to the Grand Canyon!

Make sure to include the famous Way 66 stretch between Oatman and Seligman in your itinerary if you choose that route.

Antelope Canyon is located in the state of Arizona. From the city of Las Vegas

How to get to the Antelope Canyon?

Antelope Canyon is accessible from Phoenix via Route 17 and Route 89.

Take a detour to Sedona, on Highway 89A, if you have the time. It’s a breathtakingly beautiful scenic byway that’s definitely worth the extra effort.

This drive should take you around six hours if you don’t take the diversion.

How to get to the Antelope Canyon?

What Should You Bring to Antelope Canyon?

That is dependent on the policies of your trip operator.

We had no restrictions on our excursion. We could bring our bags and backpacks even though we couldn’t eat or drink once within the canyon.

Some tour companies, however, state on their websites that backpacks are not permitted.

So, before you book your tour, double-check the conditions.

What Should You Bring to Antelope Canyon?

Is it OK to bring a little child?

Again, this is dependent on your trip operator’s policies, so double-check with them before booking.

Because of the ladders, you can’t carry a stroller into the Lower Canyon. In terms of a baby backpack, I’m not sure I’d have felt safe wearing one in the Lower Canyon.

Some of the hike’s sections were simply too narrow.

It might have been feasible to remove a backpack and hand the infant over, but it would have required extreme caution.

Is it OK to bring a little child?

Are Antelope Canyon’s Ladders Safe or Scary?

The ladders are located in the lower canyon, and I found them to be extremely safe.

I’m afraid of heights, yet I had no trouble with them.

They weren’t very lengthy, and they felt extremely secure.

Are Antelope Canyon's Ladders Safe or Scary?

Is This a Technical or Difficult Hike?

Nope. I’m not in great shape, yet the hike was no problem for me.

It’s not too quick – everyone always pauses for photos – and the ground is reasonably flat (with the exception of the ladders themselves).

Is This a Technical or Difficult Hike?

What Time of Day Is Best to Visit Antelope Canyon?

That’s a question that a lot of people have.

Because of the angle of the sun, the guides typically propose early morning or late afternoon.

Personally, I believe that this is a factor that should be considered by professional photographers.

We went on a mid-day tour and had a fantastic time (I’ll share some photographs with you shortly — they seem fairly nice to me).

What Time of Day Is Best to Visit Antelope Canyon?

Should you visit the Antelope Canyon?

Based on the facts available, let’s deep dive and see whether you should be visiting the Antelope Canyon or not.

Should you visit the Antelope Canyon?

Antelope canyon is crowded

From April through October, when the light beams shine down into the canyon’s upper portion, Antelope Canyon has become a highly popular destination in the Southwest.

Even though the number of people that visit the canyon each day is limited by the need that they do so on a guided tour, the number of people coming each day has increased significantly in recent years.

The canyon’s vastness, on the other hand, hasn’t altered, so you’ll often be elbow-to-elbow with other hikers.

The canyon also gets quite small at places, which you notice ten times more when there are a lot of people inside.

Antelope canyon is crowded

You don’t have to spend a fortune

Upper Antelope Canyon tours are also not inexpensive.

A normal trip costs between $40 and $60 per person, with midday tours being the costliest.

The basic trips include transportation from Page, a Navajo park fee, and an hour-long slot canyon guided tour.

Photography-focused trips cost $80-$90 per person and enable you to carry a tripod and offer you two hours within the canyon.

You don’t have to spend a fortune

Tours tend to get hurried

I’m not sure about the photography excursions, but I’ve heard that the normal Antelope Canyon tours may be hurried.

This is due to the fact that everything is on a timer, and they don’t want any stragglers to throw things off.

Unfortunately, if the light beams do not appear until the last 10 minutes of your trip, you will not have any further time to photograph or observe them.

Tours tend to get hurried

Tours are well organized

Things really operate quite smoothly considering the number of people they transport down the canyon each day.

You travel one way through the canyon, pausing periodically for your guide to point out interesting rock formations or assist you with photography.

Then, on the way out, you go considerably faster (so rapidly, in fact, that you’re not allowed to stop at all – but our party did pause momentarily to observe some light beams).

Tours are well organized

You can focus more on photography

If you are able to arrange a longer photography trip, you will be given first preference for the greatest photo locations.

People typically appreciate the idea that you’ve paid a little more in the hopes of taking better photographs in the canyon, and guides will try to shoo people out of your views.

You can focus more on photography

Final words

Based on these facts, you can decide whether you should be visiting the Antelope Canyon or not. The decision you take will not be something that you will regret about in the future.

Can You Drive To Cape Lookout Lighthouse?

It’s hard to approach Cape Lookout National Seashore without being pulled to its famous lighthouse, which has a distinctive diamond-shaped design and stands at a height of 163 feet. The Cape Lookout National Seashore, located off the Crystal Coast (also known as the southern Outer Banks) of North Carolina, stretches 56 miles over barrier islands that are home to not only the Cape Lookout Lighthouse but also wild ponies, gorgeous beaches, and breathtaking vistas.

Are you planning a day trip to Cape Lookout, North Carolina? Here’s how to get there and what you should know before going!

What is the best way to get to Cape Lookout?

If you’re not taking a private boat to Cape Lookout, you’ll have to take the ferry!

The only legal ferry service to reach the national seashore from either Beaufort or Harkers Island is Island Express Ferry Service (it’s a 45-minute journey from Beaufort, although Beaufort is more accessible as a starting point for many tourists to the Crystal Coast).

The present lighthouse, which was erected in the late 1850s, is the second to stand at this remote National Seashore location.

This “new” 1859 lighthouse, which replaced an 1812 lighthouse that only stretched 96′ ft. into the sky and was therefore ineffectual for seafarers far offshore, reached 163′ ft. into the sky and was equipped with a first-order Fresnel lens that allowed the beacon to illuminate the region.

The light’s subsequent 12-19 mile range was critical, as Cape Lookout is surrounded by changing sandbars and strong currents, serving as the ultimate resting place for decades of shipwrecks.

Though it was first lit in 1859, it wasn’t until 1873 that it was given its characteristic diamond pattern, which set it apart from other lighthouses on the Outer Banks.

(On fact, the Bodie Island Lighthouse in the Northern Outer Banks and the Cape Lookout Lighthouse would be virtually similar if it weren’t for the differing paint schemes.)

You may find additional information on the National Park Service page if you wish to explore Portsmouth Village and/or bring your car to the Cape Lookout National Seashore–but for a day trip to Cape Lookout, you’ll want to start from either Beaufort or Harkers Island!

The ferry trip is a joy in and of itself: the barrier islands and gorgeous sea provide for a spectacular vista, and if you’re lucky, you could even see some wild ponies on Shackleford Banks and some curious dolphins!

What is the best way to get to Cape Lookout?

Read: Is Traveling A Hobby? The Ultimate Guide To An Exciting Way Of Life

Learn about Reasons why traveling is A hobby

Can you drive to Cape Lookout Lighthouse?

Yes, it is possible for you to drive to Cape Lookout Lighthouse.

However, there are some important tips to keep in mind before you go ahead with it.

Then you will be able to stay away from frustrating situations that you may come across.

At Cape Lookout National Seashore, driving on the beach is permitted on the North and South Core Banks.

On Shackleford Banks, no cars are permitted.

Because none of the islands have bridges, you must use a car ferry, which is not inexpensive.

From Davis, North Carolina, and Atlantic, North Carolina, ferries go to South Core Banks and North Core Banks, respectively.

Because concessionaires might vary with each contract renewal, the current list of ferry operators can be found on the Cape Lookout National Seashore’s List of Authorized Ferry Services web page.

If you believe you can make it through the sand in a street-legal car, I recommend nothing less than a high-clearance 4-Wheel Drive vehicle (as does the National Park Service).

The only cars that get stuck, according to a park ranger at North Core Banks, are 2-Wheel Drives, and despite being warned not to bring them across, people still try.

Keep in mind that 4-Wheel Drives get stuck as well, generally in “sugar sand,” the deep and soft sand in the cabin complexes, on the beach ramps, and on the rear service road, as the locals refer to it.

A seasoned beach driver, on the other hand, informed me that he’s never encountered a case when a stranded car required a tow truck because most can be pulled out with a little effort—which is why part of the mandatory safety equipment is for this purpose.

Surprisingly, he told me that larger vehicles with campsites, not lighter SUVs, are more prone to become trapped.

I would have thought that adding weight to the car would give it greater traction, but I guess it only leads the wheels to dig deeper into the sand.

The Park service suggests bringing a tow rope, jack and stand, fire extinguisher, wood boards to put under the tires for traction, and a shovel in case you get trapped in the sand.

Nobody, on the other hand, checks to see whether you have any of this gear.

All you’ll need is an ORV Educational Certificate, which is a free permission you’ll need to drive on the beach.

You must declare in writing that you have read and comprehended the Off Road Driving Rules, as well as provide some basic vehicle information and the reason for your beach driving.

You can acquire one when you arrive on the island at the Great Island or Long Point cabin offices, or you can get one ahead of time by contacting the National Park Service with your vehicle details.

If the cabin office is closed for whatever reason, I recommend acquiring one ahead of time. The certificate / decal that you put on your car is valid for a year.

I was first worried about driving on the beach because of the risk of becoming trapped.

I’d done a lot of “4-Wheeling” on rough roads before, but the only beach I’d drove on before was Daytona Beach in Florida, which is as hard as cement.

My fears were unfounded, because with a 4-wheel drive car and a little common sense, you can pretty much go through any sort of sand.

Can you drive to Cape Lookout Lighthouse?

Here are some tips to keep in mind as you drive to the Cape Lookout Lighthouse

  • Reduce the pressure in your tires to 20 psi. Make sure you have a tire pressure gauge on hand. You may fill up your tires for free at the boat ports when you return.
  • If you’re driving in soft sand, don’t slam on the brakes because the wheels will dig into the sand. In fact, avoid stopping on the soft sand at all costs.
  • When driving on soft sand, drive in the tire tracks of prior cars to avoid compacting the sand.
  • To obtain an ORV Educational Certificate, go to http://www.orv.org/cert
  • You must be 16 years old and have a valid driver’s license to participate.
  • Your car must be properly registered and equipped with a license plate.
  • Don’t drive on closed beaches or trails designated “Authorized Vehicles Only.” You may drive on it if it seems to be a road and is not closed or designated as such.
  • Only drive on the ocean beach, not across the sand dune or along the sound’s coast.
  • If you park, ensure sure there is enough space between you and the water for other vehicles to pass.
  • Make sure you don’t run anyone over.
  • The speed limit is marked and ranges from 15 to 25 miles per hour.
  • It is not a good idea to drink and drive.
  • All of the foregoing laws apply to ATV drivers, as well as the requirement to wear a helmet and eye protection.

Things to Do on a Cape Lookout National Seashore Day Trip

There are numerous activities to do while you are spending time at the Cape Lookout Lighthouse.

Let’s explore some of the most prominent activities that you can engage with out of them.

Things to Do on a Cape Lookout National Seashore Day Trip

Climb to the top of the lighthouse.

If you come between May and October (the lighthouse shutters in the winter), this is without a doubt the #1 thing to do in Cape Lookout: the 207-step walk up the spiral staircase rewards visitors with extremely stunning views across the Cape Lookout National Seashore and adjacent barrier islands.

If you’re planning on climbing the lighthouse, make sure to verify the opening times before going.

Check the National Park Service website for the most up-to-date pricing and hours.

Because climbing permits are limited, we recommend going to the ticket counter as soon as you get on the island, receiving an allotted climbing time, and then organizing the remainder of your Cape Lookout Day trip around it.

Climb to the top of the lighthouse.

Check out the Keepers’ Quarters Museum

A tiny museum next to the lighthouse details the history of the 19th-century lighthouse and people who cared for it until it was completely automated in 1950–well worth a visit on your day trip to Cape Lookout!

Check out the Keepers' Quarters Museum

Look for the free-roaming horses.

The wild horses of Shackleford Banks and the adjacent environs are said to be descended from Mustangs who survived a 16th-century Spanish shipwreck.

That origin is a matter of discussion, but there’s no denying that North Carolina’s wild horses are a popular addition to family holidays in the area (they were a huge hit with me when I was a youngster)! Please keep a 50-foot gap between you and the horses for everyone’s safety.

Look for the free-roaming horses.

Take a trip to the beach.

Of course, no vacation to the beautiful coastline near Cape Lookout would be complete without some beach time! On one side of the barrier island, the seas are quiet and peaceful, while on the other, the Crystal Coast is famed for its rolling waves.

You’ll have a wonderful day regardless of whatever beach you select!

Take a trip to the beach.

Tips to keep in mind when visiting the lighthouse

There are few important tips that you will need to keep in mind at the time of visiting the lighthouse. Let’s take a look at some of the most important tips out of them.

To say the least, the amenities around the Cape Lookout National Seashore are minimal. Near the lighthouse, there are restrooms and water faucets, but not much more.

As a result, guests should pack food, sunscreen, and a large spray bottle.

If you travel, be sure to leave enough time to see the neighboring beaches! The Cape Lookout National Seashore is known for its fantastic fishing and shelling and staying a while to explore the beach is well worth it.

Once you get on the island, there is a “taxi service” that will transport you to the greatest shelling and fishing beaches (which are located around the point, or roughly a mile or two away from the passenger ferry docks).

The journey is a little more expensive, but it’s a fun opportunity to get a closer look at the seaside, since it goes by ancient homes and towns as well as miles of beautiful beachfront.

Do you want to remain a little longer? Within the Cape Hatteras National Seashore, the National Park Service administers a few primitive beach houses.

These homes are a feasible alternative for guests who wish to explore the kilometers of beachfront in depth, with amenities such as air conditioning, wheelchair accessible facilities, and magnificent beach views.

Tips to keep in mind when visiting the lighthouse

Final Words

The most difficult element of seeing the Cape Lookout Lighthouse is getting there, but there are a few choices for getting there. You may either get to the site on a privately owned boat, or the National Park Service has commissioned the Island Express Ferry Service, which is based in the towns of Beaufort and Harker’s Island, to take tourists to the site. Reservations should be made well ahead of time, particularly during the peak summer season.

It’s a scenic 20-45 minute cruise across the Back Sound or Core Sound to reach the Cape Lookout barrier island shoreline, and from there, visitors can easily follow the paths and boardwalks to the primary National Park Service (NPS) visitors center and the Cape Lookout Lighthouse site, depending on their preferred mode of transportation.

On the island, the old keeper’s quarters have been turned into a small museum, and National Park Service rangers are usually on hand to answer inquiries about the lighthouse and the nearby beaches.

[9 Best] Kid Friendly Hikes At Mount Hood

With an elevation of 11,250 feet, Mt. Hood dominates the Portland skyline. It is located to the east of the city and is a year-round outdoor adventurer’s paradise. You don’t want to miss out on everything Mt. Hood has to offer, whether you live in the Portland metro area or are simply passing through. I’ll give you the lowdown on Mt. Hood’s greatest treks for discovering and appreciating this Pacific paradise.

All of these paths have been visited by me many times throughout my stay in Portland. And, like a good novel or movie, they seem to offer something fresh every time I trek them. In the winter, the same route is virtually unrecognizable compared to the summer, and an early morning trek evokes a sense of unbridled possibilities, but a late afternoon trip evokes a lazy calm. You’re in for some of the greatest hiking Oregon has to offer, no matter what time of day or year you start your trip.

When is the Best Time to Hike Mt. Hood?

Because Mt. Hood is such a massive peak, it receives a lot of snow during the winter and far into the spring.

Many of these walks will be unavailable at this season, however others will make excellent snowshoeing choices.

If in doubt, check the snow level and, if possible, seek for recent trail reports, since conditions can quickly change.

In only a few days, a burst of mild spring weather may remove a route that had been blanketed in snow.

For clean trails, safer stream crossings, and little to no snow, these walks are best done in the summer and early fall.

When is the Best Time to Hike Mt. Hood?

Read: Is Traveling A Hobby? The Ultimate Guide To An Exciting Way Of Life

Learn about Reasons why traveling is A hobby

Hiking Tips at Mt. Hood Parking

To park, many Mt. Hood climbs will require a NW Forest Pass, which isn’t always straightforward to get at the trailhead.

To save time and bother, purchase one ahead of time at a shop, ranger station, or online. With a “NWFP” next to it, I’ve noted which trailheads require a pass.

Even in the heat, it is necessary to wear robust footwear.

Hiking poles are an excellent choice for stream crossings and loose scree on the longer and higher mountain hikes.

Don’t underestimate the strength of the light bouncing off the snow on your winter travels — carry sunglasses! Also, don’t worry if you don’t have a pair of snowshoes (or can’t borrow them from a buddy).

They may be rented from a variety of outfitters.

Try Next Adventure or the Mountain Shop in Portland, or Otto’s in Sandy.

Crowds: Mt. Hood’s closeness to Portland, like the Gorge, makes it a popular hiking destination, especially on weekends.

On a bright day, some of the more popular trailheads that service several routes, such as Mirror Lake, will be packed.

To guarantee a place, arrive early or visit during the week.

Hiking Tips at Mt. Hood Parking

Best kid-friendly hikes at Mount Hood

Now it’s time for the treks! There are 11 fantastic hiking routes around Mt. Hood listed below.

The majority of them are on Hood’s south side, which is easily accessible from Portland.

There are a handful on Mt. Hood’s eastern slope that are a little further away from Portland.

I included a remark to call out such paths, so you don’t end up driving further than you anticipated in order to reach the trailhead.

Best kid-friendly hikes at Mount Hood

Ramona Falls

Ramona Falls is so beautiful that you’ll think you’ve landed onto a movie set for a fancy fairy realm.

It’s one of the greatest waterfall treks around Mt. Hood, with vistas, wildflowers, and, of course, the 120-foot falls as the grand finish!

Because this hike’s highest point is just under 3,500 feet, it blooms earlier in the spring than other routes further up.

However, because of a potentially dangerous river crossing, this trek is best done in the late summer or early fall.

Regarding the river crossing, the path to cross the Sandy River has changed every year since the old bridge washed down in 2014 and the forest service chose not to build a new one.

You can usually cross the river on a log, although you may have to ford the river on foot at times.

It’s typically feasible, and you’ll be OK for the most part, especially in the summer, but it’s not the ideal trek for little children.

Bring trekking poles or a strong stick to assist you in crossing the river without falling.

Ramona Falls

McNeil Point

There are two routes to McNeil Point, but for the spectacular vistas and more time on Bald Mountain, we prefer this 10-miler.

You may start at McGee Creek Trailhead instead of Top Spur Trailhead if you want to cut a couple miles off your hike or if the Top Spur Trailhead is too crowded.

The McGee trailhead is (usually) much less busy, and it also leads to McNeil Point through a scenic path.

This is one of my favorite late-summer day hikes around Mt. Hood because of the varied terrain, alpine vistas, and cool small stone shelter with Hood’s towering peak above you.

At the shelter, there’s a short “climbers route” that will take you much higher for even greater views, but only if there’s no snow and you’re sure of your footing.

Even in late July, there may still be snow on the talus slopes on this path, which climbs to nearly 6,000 feet. Wear the appropriate footwear.

Bald Mountain via Lolo Pass

Bald Mountain via Lolo Pass

Because the paths overlap at the Bald Mountain Shelter, if you choose the longer route on the McNeil walk, you’ll have already completed a section of this trek.

Bald Mountain is 4,591 feet tall, and I’m constantly surprised by how quiet this trail is and how spectacular the peak is.

It’s beautiful, and at the summit, you’ll get a fantastic view of Mt. Hood, which is so near that it almost smacks you in the face.

You’ll never want to leave if you can arrange your trip to reach the peak in the late afternoon sun.

The route is well-graded and well-maintained throughout, and there is an ancient fire lookout at the summit (rather markers where the lookout used to stand).

You might be disappointed when you reach the top since there’s so much tree cover, but don’t give up – keep walking a little farther until you find a rocky outcropping that’s a great location for lunch.

Enjoy your food while gazing up at Mt. Hood before heading back down the path you came.

Tom, Dick, and Harry Mountain

Although Tom, Dick, and Harry Mountain is a two-mile-long ridge with three notable crags (named Tom, Dick, and Harry), this climb only goes to Harry.

At little over 5,000 feet, Tom is the highest, and there is an unmarked loop option to cover them all, but I haven’t tried it yet, so I won’t include it here.

This out-and-back trek initially circles you around Mirror Lake before ascending (and seeing fewer people) to the peak for a bird’s eye perspective of it.

The vistas are one of my favorite aspects of this trek, aside from its accessible location and value-for-money workout.

Yes, seeing out over the Cascade Range and down onto Mirror Lake is beautiful, but I also enjoy following Route 26 around the mountain and observing places like Government Camp and Timberline Lodge from the top.

It’s wonderful to be away from society and surrounded by nature, but it’s also intriguing to observe how we people fit into it all.

Due to its proximity and ease of access from Portland, this is one of the greatest climbs around Mt. Hood and always gets a lot of traffic.

This is something to keep in mind while planning your hike.

Mirror Lake is only a few miles away, however on a beautiful weekend, parking can be difficult (if not impossible) due to the large number of families trying to get to the lake.

Tom, Dick, and Harry Mountain

Timberline Lodge to Zigzag Overlook

You’ll have nothing but spectacular alpine vistas from the start of this short climb, which starts at Timberline Lodge.

The lodge is about 6,000 feet above sea level, and this trek mostly stays at that elevation, skirting the timberline to reach the enormous Zig Zag Canyon.

The Canyon is massive, with views of Mt. Hood and the Zig Zag Glacier.

Because it’s only a little over two miles to this point, it’s a great way for families to enjoy some beautiful vistas without putting in a lot of effort.

You’ll be on the PCT for the most of this walk, and if you feel the urge to put in some extra miles, drop through Zig Zag Canyon for a new perspective on the vista up to the peak.

It’s a very steep slope, and you’ll lose approximately 500 feet before gaining another 1,000 to reach the top.

If you continue on this path, you’ll reach the popular (but much longer and more difficult) Paradise Park trek.

Timberline Lodge to Zigzag Overlook

Laurance Lake

Laurance Lake is a little further from Portland than some of the other walks listed here (around an hour and 45 minutes), but it’s worth the extra travel for a great hike with less people than you’ll find elsewhere.

This out-and-back trek takes you up switchbacks and out along a ridge, where you’ll get some spectacular views of Mt. Hood’s north face and nearby glaciers.

When you reach the summit, look down on Laurance Lake, which is framed by Mt. Hood.

Another advantage of this location is that it usually appears to be swarming with bald eagles, so keep a look out.

If you go on a hot summer day, you may walk in the morning and then picnic and swim in the lake for the remainder of the day!

You’ll be passing through Parkdale anyhow, so you may as well stop at Solara Brewing on your way home!

Laurance Lake

The Timberline Trail

We couldn’t talk about Mt. Hood treks without mentioning the Timberline Trail, which is the mother of all Mt. Hood hikes.

This is a multi-day backpacking trip that most people do in four days and three nights, but if you’re very adventurous, you can do it in three days and two nights (I even had a buddy who did it in two!).

I try to keep my days around 12 miles when I backpack so that I can really rest (sleep) and enjoy the landscape after setting up camp, so four days sounds perfect to me.

Put this baby on your bucket list if you want to truly experience the finest of Mt. Hood hiking.

The Timberline Trail circles the mountain, providing views of Zig Zag Canyon, Ramona Falls, Elk Cove, and the Cooper Spur Shelter, to mention a few.

You’ll climb and descend from about 3,000 feet to a peak point of 7,350 feet.

Most people prefer to complete the circle clockwise from Timberline Lodge, which provides handy pauses at Ramona Falls (10 miles), Elk Cove (20 miles), and Gnarl Ridge (30 miles).

Unless it’s been an unusually dry year, you won’t have to worry about running out of water.

There are several stream crossings, some of which can be extremely dangerous.

Though you should use caution at all of them, the White River Crossing, located at mile 36 (if traveling west from the lodge), is the one that can pose the most problems.

This crossing varies from year to year, and hikers generally set flags or cairns to mark the safest fording spot.

The Timberline Trail

Mirror Lake

If you can, schedule your Mirror Lake trek during a weekday, but if that isn’t possible, get there as early as possible on the weekend.

Mirror Lake is difficult to surpass for its accessibility, shorter length, and stunning beauty.

This is one of the finest treks in Mt. Hood for families because it is reasonably level and short.

Mirror Lake is famous for drawing both amateur and professional photographers in search of the ideal reflection of Mt. Hood.

Tripods are frequently erected to capture the brief moment of magic hour when the sunset paints the mountain pink and the sky explodes with color.

In the winter, it’s also a fantastic place to go snowshoeing.

The path is well-traveled all year, making it simpler for first-time snowshoers to navigate.

If you get off track, you may generally locate someone else’s tracks to follow, even if the signs is absent or covered.

Mirror Lake

Final Words

All these are kid-friendly hikes that you can see at Mount Hood. It is up to you to pick the best hike out of them and go ahead with your hike. You will fall in love with the experience offered on your way.

[8 Best] Kid Friendly Hikes At Mount Hood

With an elevation of 11,250 feet, Mt. Hood dominates the Portland skyline. It is located to the east of the city and is a year-round outdoor adventurer’s paradise. You don’t want to miss out on everything Mt. Hood has to offer, whether you live in the Portland metro area or are simply passing through. I’ll give you the lowdown on Mt. Hood’s greatest treks for discovering and appreciating this Pacific paradise.

All of these paths have been visited by me many times throughout my stay in Portland. And, like a good novel or movie, they seem to offer something fresh every time I trek them. In the winter, the same route is virtually unrecognizable compared to the summer, and an early morning trek evokes a sense of unbridled possibilities, but a late afternoon trip evokes a lazy calm. You’re in for some of the greatest hiking Oregon has to offer, no matter what time of day or year you start your trip.

When is the Best Time to Hike Mt. Hood?

Because Mt. Hood is such a massive peak, it receives a lot of snow during the winter and far into the spring.

Many of these walks will be unavailable at this season, however others will make excellent snowshoeing choices.

If in doubt, check the snow level and, if possible, seek for recent trail reports, since conditions can quickly change.

In only a few days, a burst of mild spring weather may remove a route that had been blanketed in snow.

For clean trails, safer stream crossings, and little to no snow, these walks are best done in the summer and early fall.

When is the Best Time to Hike Mt. Hood?

Read: Is Traveling A Hobby? The Ultimate Guide To An Exciting Way Of Life

Learn about Reasons why traveling is A hobby

Hiking Tips at Mt. Hood Parking

To park, many Mt. Hood climbs will require a NW Forest Pass, which isn’t always straightforward to get at the trailhead.

To save time and bother, purchase one ahead of time at a shop, ranger station, or online. With a “NWFP” next to it, I’ve noted which trailheads require a pass.

Even in the heat, it is necessary to wear robust footwear.

Hiking poles are an excellent choice for stream crossings and loose scree on the longer and higher mountain hikes.

Don’t underestimate the strength of the light bouncing off the snow on your winter travels — carry sunglasses! Also, don’t worry if you don’t have a pair of snowshoes (or can’t borrow them from a buddy).

They may be rented from a variety of outfitters.

Try Next Adventure or the Mountain Shop in Portland, or Otto’s in Sandy.

Crowds: Mt. Hood’s closeness to Portland, like the Gorge, makes it a popular hiking destination, especially on weekends.

On a bright day, some of the more popular trailheads that service several routes, such as Mirror Lake, will be packed.

To guarantee a place, arrive early or visit during the week.

Hiking Tips at Mt. Hood Parking

Read: Mt. Moosilauke Winter Hike (What to expect)

Learn about the Mount Jim Ridge trail

Best kid-friendly hikes at Mount Hood

Now it’s time for the treks! There are 11 fantastic hiking routes around Mt. Hood listed below.

The majority of them are on Hood’s south side, which is easily accessible from Portland.

There are a handful on Mt. Hood’s eastern slope that are a little further away from Portland.

I included a remark to call out such paths, so you don’t end up driving further than you anticipated in order to reach the trailhead.

Best kid-friendly hikes at Mount Hood

Read: 12 Best Washington Spring Hikes To Try Out In [year]

Learn about Hoh Rain Forest Loop trail

1. Ramona Falls

Ramona Falls is so beautiful that you’ll think you’ve landed onto a movie set for a fancy fairy realm.

It’s one of the greatest waterfall treks around Mt. Hood, with vistas, wildflowers, and, of course, the 120-foot falls as the grand finish!

Because this hike’s highest point is just under 3,500 feet, it blooms earlier in the spring than other routes further up.

However, because of a potentially dangerous river crossing, this trek is best done in the late summer or early fall.

Regarding the river crossing, the path to cross the Sandy River has changed every year since the old bridge washed down in 2014 and the forest service chose not to build a new one.

You can usually cross the river on a log, although you may have to ford the river on foot at times.

It’s typically feasible, and you’ll be OK for the most part, especially in the summer, but it’s not the ideal trek for little children.

Bring trekking poles or a strong stick to assist you in crossing the river without falling.

Ramona Falls

Read: 14 Best Hikes In Denali National Park To Try Out [year]

Learn about The Gorge Creek Trail

2. McNeil Point

There are two routes to McNeil Point, but for the spectacular vistas and more time on Bald Mountain, we prefer this 10-miler.

You may start at McGee Creek Trailhead instead of Top Spur Trailhead if you want to cut a couple miles off your hike or if the Top Spur Trailhead is too crowded.

The McGee trailhead is (usually) much less busy, and it also leads to McNeil Point through a scenic path.

This is one of my favorite late-summer day hikes around Mt. Hood because of the varied terrain, alpine vistas, and cool small stone shelter with Hood’s towering peak above you.

At the shelter, there’s a short “climbers route” that will take you much higher for even greater views, but only if there’s no snow and you’re sure of your footing.

Even in late July, there may still be snow on the talus slopes on this path, which climbs to nearly 6,000 feet. Wear the appropriate footwear.

Bald Mountain via Lolo Pass

Read: 8 Best Hikes In Saguaro National Park Rated

Learn about Valley View Overlook Trail

3. Bald Mountain via Lolo Pass

Because the paths overlap at the Bald Mountain Shelter, if you choose the longer route on the McNeil walk, you’ll have already completed a section of this trek.

Bald Mountain is 4,591 feet tall, and I’m constantly surprised by how quiet this trail is and how spectacular the peak is.

It’s beautiful, and at the summit, you’ll get a fantastic view of Mt. Hood, which is so near that it almost smacks you in the face.

You’ll never want to leave if you can arrange your trip to reach the peak in the late afternoon sun.

The route is well-graded and well-maintained throughout, and there is an ancient fire lookout at the summit (rather markers where the lookout used to stand).

You might be disappointed when you reach the top since there’s so much tree cover, but don’t give up – keep walking a little farther until you find a rocky outcropping that’s a great location for lunch.

Enjoy your food while gazing up at Mt. Hood before heading back down the path you came.

Read: 10 Kid Friendly Hikes In The Red River Gorge Reviewed

Learn about Tom McCall Preserve trail

4. Tom, Dick, and Harry Mountain

Although Tom, Dick, and Harry Mountain is a two-mile-long ridge with three notable crags (named Tom, Dick, and Harry), this climb only goes to Harry.

At little over 5,000 feet, Tom is the highest, and there is an unmarked loop option to cover them all, but I haven’t tried it yet, so I won’t include it here.

This out-and-back trek initially circles you around Mirror Lake before ascending (and seeing fewer people) to the peak for a bird’s eye perspective of it.

The vistas are one of my favorite aspects of this trek, aside from its accessible location and value-for-money workout.

Yes, seeing out over the Cascade Range and down onto Mirror Lake is beautiful, but I also enjoy following Route 26 around the mountain and observing places like Government Camp and Timberline Lodge from the top.

It’s wonderful to be away from society and surrounded by nature, but it’s also intriguing to observe how we people fit into it all.

Due to its proximity and ease of access from Portland, this is one of the greatest climbs around Mt. Hood and always gets a lot of traffic.

This is something to keep in mind while planning your hike.

Mirror Lake is only a few miles away, however on a beautiful weekend, parking can be difficult (if not impossible) due to the large number of families trying to get to the lake.

Tom, Dick, and Harry Mountain

Read: 10 Best Dog-friendly Hikes In Acadia National Park

Learn about Wonderland Trail – 1.6 mile distance

5. Timberline Lodge to Zigzag Overlook

You’ll have nothing but spectacular alpine vistas from the start of this short climb, which starts at Timberline Lodge.

The lodge is about 6,000 feet above sea level, and this trek mostly stays at that elevation, skirting the timberline to reach the enormous Zig Zag Canyon.

The Canyon is massive, with views of Mt. Hood and the Zig Zag Glacier.

Because it’s only a little over two miles to this point, it’s a great way for families to enjoy some beautiful vistas without putting in a lot of effort.

You’ll be on the PCT for the most of this walk, and if you feel the urge to put in some extra miles, drop through Zig Zag Canyon for a new perspective on the vista up to the peak.

It’s a very steep slope, and you’ll lose approximately 500 feet before gaining another 1,000 to reach the top.

If you continue on this path, you’ll reach the popular (but much longer and more difficult) Paradise Park trek.

Timberline Lodge to Zigzag Overlook

Read: [10 Best] Hikes In Pinnacles National Park

Learn about the Best moderate hikes at the park

6. Laurance Lake

Laurance Lake is a little further from Portland than some of the other walks listed here (around an hour and 45 minutes), but it’s worth the extra travel for a great hike with less people than you’ll find elsewhere.

This out-and-back trek takes you up switchbacks and out along a ridge, where you’ll get some spectacular views of Mt. Hood’s north face and nearby glaciers.

When you reach the summit, look down on Laurance Lake, which is framed by Mt. Hood.

Another advantage of this location is that it usually appears to be swarming with bald eagles, so keep a look out.

If you go on a hot summer day, you may walk in the morning and then picnic and swim in the lake for the remainder of the day!

You’ll be passing through Parkdale anyhow, so you may as well stop at Solara Brewing on your way home!

Laurance Lake

Read: [9 Best] Hikes In Everglades National Park

Learn about Pa-hay-okee Overlook

7. The Timberline Trail

We couldn’t talk about Mt. Hood treks without mentioning the Timberline Trail, which is the mother of all Mt. Hood hikes.

This is a multi-day backpacking trip that most people do in four days and three nights, but if you’re very adventurous, you can do it in three days and two nights (I even had a buddy who did it in two!).

I try to keep my days around 12 miles when I backpack so that I can really rest (sleep) and enjoy the landscape after setting up camp, so four days sounds perfect to me.

Put this baby on your bucket list if you want to truly experience the finest of Mt. Hood hiking.

The Timberline Trail circles the mountain, providing views of Zig Zag Canyon, Ramona Falls, Elk Cove, and the Cooper Spur Shelter, to mention a few.

You’ll climb and descend from about 3,000 feet to a peak point of 7,350 feet.

Most people prefer to complete the circle clockwise from Timberline Lodge, which provides handy pauses at Ramona Falls (10 miles), Elk Cove (20 miles), and Gnarl Ridge (30 miles).

Unless it’s been an unusually dry year, you won’t have to worry about running out of water.

There are several stream crossings, some of which can be extremely dangerous.

Though you should use caution at all of them, the White River Crossing, located at mile 36 (if traveling west from the lodge), is the one that can pose the most problems.

This crossing varies from year to year, and hikers generally set flags or cairns to mark the safest fording spot.

The Timberline Trail

Read: [9 Best] Stroller Friendly Hikes Sedona In ([year]))

Learn about Devil’s Bridge Trail

8. Mirror Lake

If you can, schedule your Mirror Lake trek during a weekday, but if that isn’t possible, get there as early as possible on the weekend.

Mirror Lake is difficult to surpass for its accessibility, shorter length, and stunning beauty.

This is one of the finest treks in Mt. Hood for families because it is reasonably level and short.

Mirror Lake is famous for drawing both amateur and professional photographers in search of the ideal reflection of Mt. Hood.

Tripods are frequently erected to capture the brief moment of magic hour when the sunset paints the mountain pink and the sky explodes with color.

In the winter, it’s also a fantastic place to go snowshoeing.

The path is well-traveled all year, making it simpler for first-time snowshoers to navigate.

If you get off track, you may generally locate someone else’s tracks to follow, even if the signs is absent or covered.

Mirror Lake

Final Words

All these are kid-friendly hikes that you can see at Mount Hood. It is up to you to pick the best hike out of them and go ahead with your hike. You will fall in love with the experience offered on your way.

How To Get To Antelope Canyon

The natural beauty of Antelope Canyon makes it one of the most sought-after tourist attractions in the world, yet entry to this natural wonder is only possible with the help of a Navajo guide. Here, we’ll walk you through the steps of visiting this incredible location.

Antelope Canyon is unlike any other place on the planet. When the sun shines brightly in the middle of the day, shafts of light cut into the canyon, highlighting the canyon’s thin orange and yellow sandstone walls. Photographers from all over the world come to capture the effect, which is almost unreal.

Visiting Antelope Canyon, on the other hand, isn’t as easy as pulling up to a parking lot and going up to the entrance. However, we’re here to show you the ropes, from how to hire a Navajo guide to how to capture the changing light.

Where is the Antelope Canyon?

Antelope Canyon is located in the state of Arizona.

It is part of the Lake Powell Navajo Tribal Park, which is located 10 minutes east of Page, on the Arizona-Utah border, and was formed by millions of years of erosion.

Although there is just one slot canyon in the park, there are two places to visit: Upper Antelope Canyon and Lower Antelope Canyon.

Upper Antelope Canyon is the more popular entry because it is at ground level and has a less than 2% slope.

Lower Antelope Canyon necessitates descending (and ascending) many flights of steps and ladders.

The trip from Phoenix to Antelope Canyon takes around four and a half hours.

When you include in parking, travel time, and real time spent in the canyons, your excursions might run up to two hours after you arrive.

As a result, many individuals choose to stay at least one evening.

The majority of excursions begin in Page or near the park’s Highway 98 entrance.

Arrive 15 minutes early at the very least.

Where is the Antelope Canyon?

Read: Is Traveling A Hobby? The Ultimate Guide To An Exciting Way Of Life

Learn about Reasons why traveling is A hobby

How to get to Antelope Canyon?

What is the best way to travel to Antelope Canyon?

You may either drive yourself or take a guided excursion to Antelope Canyon.

If you’re intending to drive alone, Phoenix and Las Vegas are both common beginning places.

Regardless of where your adventure begins, you’ll need to drive as far as Page, Arizona to reach Antelope Canyon:

The journey from Las Vegas to Page takes around 4.5 hours one way, and you’ll pass by many other famous Southwest sights along the way, including the Grand Canyon’s South Rim.

Page is roughly a 5-hour trip from Phoenix.

This route passes via Flagstaff and Sedona, two renowned Southwest destinations.

The only way to enter Antelope Canyon and view it up close from Page is to take a guided trip.

To access Upper OR Lower Antelope Canyon, you must be accompanied by a guide.

Guided excursions are offered from both Las Vegas and Page, Arizona.

Some guided excursions from Las Vegas fly to Page, so instead of a 4.5-hour drive through the desert, you may be to Antelope Canyon in just two hours—and in the luxury of a specially-designed sightseeing jet.

You’ll join one of the guided excursions that depart from Page after you arrive.

How to get to Antelope Canyon?

Read: Is Antelope Canyon Worth It?

Learn about the Guided Tours of Upper Antelope Canyon

Should I go on a self-directed tour or a guided one?

When it comes to Antelope Canyon guided tours, you have four options:

  • Upper or Lower Antelope Canyon standard tour
  • Upper Antelope Canyon photo tour
  • Upper Antelope Canyon at Night Tour
  • Tours on the water
Should I go on a self-directed tour or a guided one?

Read: Bryce Canyon VS Antelope Canyon ( Pros And Cons For Each ) 

Learn about Why you should go to Bryce Canyon National Park?

Standard tours

Both Upper and Lower Antelope Canyon have standard tours offered.

A knowledgeable Navajo guide will accompany you around the Canyon, pointing out some of the most impressive structures.

They’ll also be able to offer advice on how to take better photos with your smartphone or small camera.

Standard tours

Photograph tours

You’ll need to schedule a special photo trip if you want to get that ideal sunbeam image or a snapshot without roaming visitors in the backdrop.

While you take photographs, your Navajo guide will stop other visitors from passing for 1-2 minutes.

They’ll also teach how to use your camera’s best settings and provide other helpful hints for capturing the perfect image.

You’ll need a permission from Navajo Parks Management if you want to sell your Antelope Canyon photographs.

Permits are $50 if purchased in advance, but they cost $200 if you are found selling a photograph without one.

Photograph tours

Night time tours

After twilight, take a stroll around Upper Antelope Canyon.

Your guides will use an LED light panel to paint the sweeping walls of Antelope Canyon in order for you to capture a surreal long-exposure photo.

There are both photo and non-photo tours offered.

Night time tours

Tours on the water

A boat trip of Antelope Canyon’s waterside is available.

The duration of a boat excursion is usually between 60 and 90 minutes.

Antelope Point Marina and Wahweap Boat Tours are the two boat tour companies.

Hidden Canyon Kayak Tours offers kayak tours as well.

No prior kayaking experience is necessary, and all equipment is provided.

Tours on the water

What is the best time to go to Antelope Canyon?

Antelope Canyon is open all year; however, most visitors prefer to visit during the day on weekends between March and October, when the light shafts occur.

The crowds will be at their height, making it tough to capture that ideal image.

During the off-season, from November to late February, and especially in January, you’ll find lower rates, less people, and still spectacular vistas.

Antelope Canyon may close during days of severe rain or snow; however, this is unusual.

During Arizona’s monsoon season, from June through September, this is more likely to happen.

Experts and reviews agree that the ideal time to see Antelope Canyon is in the middle of the day, between 11:00 a.m. and 1:30 p.m.

The light beams are powerful at this time of day, and you may capture them clearly on your camera.

The explanation for this is simple: around midday, the sun is perpendicular to the canyon, making the light effects more noticeable as more solar rays impact the enormous rock formations within the canyon.

What is the best time to go to Antelope Canyon?

Things you need to visit the Antelope Canyon

To visit Upper or Lower Antelope Canyon, you’ll need to make a reservation with a Navajo guide ahead of time.

Before you go, make a reservation online because excursions sometimes sell out weeks in advance.

You’ll also require the following:

A permit is required; however, it is generally included in your guide’s charge. If you’re visiting Lower Antelope Canyon, you’ll need good walking shoes.

Things you need to visit the Antelope Canyon

How much does it cost to visit Antelope Canyon?

Until recently, the price difference between a sightseeing and a photographic excursion was substantial.

However, because photography excursions regularly caused bottlenecks by enabling photographers to bring their tripods and spend extra time setting up photos, the tribe has restricted the availability of these tours.

The majority of Upper Antelope Canyon 90-minute excursions cost between $50 and $90 (slightly less for children), however some operators offer early bird and last-minute discounts.

Lower Antelope Canyon excursions last an hour and cost $40, with luxury versions costing up to $80.

Taxes and the $8 Navajo permission fee are usually included in the purchase, but not always.

(If you have any queries concerning additional fees, contact your tour provider.)

How much does it cost to visit Antelope Canyon?

Things you need to bring when coming to Antelope Canyon

When you come to the Antelope Canyon, you should layer your clothing and wear closed-toed, sturdy shoes.

Even in the cold, use lots of sunscreen. Bring a cap or a handkerchief to keep the sand out of your eyes, and if you wear contact lenses, opt for eyeglasses instead.

You may carry one bottle of water with you (and we highly recommend you do).

Just remember to take it with you when you leave the tour.

Bring nothing with you: Bags, purses, fanny packs, tripods, monopods, selfie sticks, food, and beverages are all forbidden in the canyon.

In the canyon, there are no garbage cans or facilities.

Things you need to bring when coming to Antelope Canyon

Prepare for the journey across the canyon

Prepare to journey in a four-wheel-drive vehicle across a sandy riverbed to the canyon, whether you start in Page or at the park’s entry.

Each vehicle has a Navajo guide who leads the party around the formations, gives information about them, and even assists in the staging of certain photographs, such as sand flowing over a rock ledge.

Sand is all over the place.

Dust can drift into your nose, mouth, and ears on windy days. If you have a DSLR camera, keep it covered when not in use (a plastic shower cap would suffice) and don’t change lenses while inside the canyon.

Prepare for the journey across the canyon

Bring your tripod along with you

Without a tripod, photographing Antelope Canyon is more difficult, but you may still capture stunning shots.

When using a DSLR, choose a high ISO and a wide aperture.

From May through October, plan a trip that will be in the canyon between 10 a.m. and 1 p.m. to capture the light beams. Remember to glance up, especially if the canyon is busy.

Horseshoe Bend Slot Canyon Excursions, for example, also offers tours to neighboring, nearly-as-spectacular canyons.

Photographers who are serious about their craft might wish to book one of these excursions as well.

Simply ask while making a reservation.

Bring your tripod along with you

Where can you stay?

Antelope Canyon, though not very isolated by Arizona standards, is nonetheless a long drive and climb for many parts of the state.

Horseshoe Bend, White Pocket and the Vermilion Cliffs, and Lake Powell are just a few of the spectacular sights nearby, so many visitors want to stay at least one night to get the most out of their vacation.

This national company is one of the area’s newest hotels, and former customers rave about its clean, comfortable rooms, helpful staff, and complimentary hot breakfast.

Boats, buses, and RVs may all be parked in the big parking area.

The Bear’s Den B&B is run by “Bubba and Deb-B,” who run an ADA-compliant three-room bed and breakfast in Page.

Pillowtop beds, a tiny fridge and microwave, private bathrooms, and plenty of bear décor are among the amenities.

Book a Navajo Hogan or sheepherder wagon at this sustainable glamping campground and B&B run by Baya, a Navajo Nation member, for a genuinely unique experience.

You’ll be staying on Navajo territory in one of eight basic cottages with nothing but vistas for miles—no power or running water, but plenty of pure drinking water.

Where can you stay?

Why should you visit Antelope Canyon?

Here are some of the reasons on why you need to come to Antelope Canyon.

If a trip to Lake Powell and Glen Canyon National Recreation Area is on your bucket list, a stay at this resort in Page’s Wahweap Marina is the best way to get there.

For a memorable day on the water, hotel guests may arrange a boat tour, dinner cruise, or hire their own powerboat.

Why should you visit Antelope Canyon?

Final words

Now you have a basic understanding on what Antelope Canyon is all about. On top of that, you also know how you need to come here. Antelope Canyon and the Navajo Nation’s lands are unique areas with beautiful scenery and natural habitats for native animals that should be preserved. Follow the Leave No Trace principles to the best of your ability so that future visitors can continue to enjoy the area.

You should know that the greatest time to visit Antelope Canyon’s Upper Canyon, Lower Canyon, or both the Upper and Lower portions of this region is when the weather is sunny, and the light beams shine on the rock formations. So, while there is no “best” time to visit Antelope Canyon, you may appreciate its beauty in any season, we recommend going when the weather is warm, sunny, and there are few visitors. Antelope Canyon is a once-in-a-lifetime event that will leave you dumbfounded. We’ve included some information on the ideal time to visit Antelope Canyon from Las Vegas, Phoenix, or anywhere else.

Congaree National Park Itinerary

The oak boughs let in an eerie amount of light. It filters through the trunks of old oaks and gum trees in beams. It makes its way through thickets of green leaves to the mushroom and rotting leaf undergrowth. The twigs are occasionally rustled by a wild turkey. Occasionally, a deer may be seen prowling through the dark woods. Welcome to Congaree National Park, the biggest national park in the United States dedicated to virgin bottomland forest.

It’s a bizarre and unique area that spans 26,000 acres of property in South Carolina’s low-lying floodplains. It gets its name from the Congaree River. That wriggling like a rattlesnake may be found to the south of sweeping Lake Marion. Vast swaths of soggy marsh line both sides of the canal. When the river overflows its banks, it becomes swampland, and the currents bring rich alluvial materials that allow the unusual champion trees and pines to such heights.

Thousands of explorers flock to this part of South Carolina these days because of the UNESCO biosphere designation and national park status. They’ve come to paddle through the foggy bayous on kayaks. Travel on a nature tour to see armadillos and feral pigs. Others want to wander along boardwalks. There are also distant Congaree National Park camping spots for individuals who want to pitch a tent and feel completely immersed in the backwoods of the Palmetto State.

If you are interested in spending your time at the Congaree National Park, here’s the itinerary that you need to follow. Adhere to this itinerary, and you will never be disappointed.

Get the excitement of camping at the Congaree National Park

Staying under canvas is the greatest way to be completely immersed in the Congaree National Park’s natural woods.

There are two camping areas in Congaree National Park where you may do exactly that.

They provide a well-managed and maintained environment where you can get up up and personal with old-growth gum trees.

The Longleaf Campground is the larger of the two authorized campsites in Congaree National Park.

It’s conveniently located at the reserve’s entrance, just off Old Bluff Road.

There are ten individual pitches as well as a couple bigger places that may accommodate parties of up to 24 people.

Each tent site also has a picnic table and a fire pit for cooking marshmallows in the evening.

Hiking paths begin immediately outside the Longleaf facility’s front entrance.

You may walk the Weston Lake Loop or the Bluff Trail, plunging into champion groves and wetlands, by taking a few steps to the south. Before you get too enthusiastic, keep in mind that you’ll need to apply for a permission to camp in Congaree National Park.

The cost of a tent starts at $10 USD each night.

Get the excitement of camping at the Congaree National Park

Read: Is Traveling A Hobby? The Ultimate Guide To An Exciting Way Of Life

Learn about Reasons why traveling is A hobby

Go for hike in the Weston Lake Loop

Put your boots on and get ready for one of the most popular circuit walks in the Congaree National Park.

The approximately five-mile route begins on the so-called Low Boardwalk and then branches off into the woods on a trail that leads southward.

It immediately surrounds you with tall trees that stand tens of meters above you, providing vistas of the reserve’s distinctive flora and wildlife.

The weather in Congaree National Park will determine what you see. Pop-up rivers are likely to encircle the base of enormous champion trees and gnarled oaks on wet, rainy days.

On drier mornings, the crispy undergrowth, lichen flowers, and emerald mosses crawl up the roots may be seen.

Whatever the weather, you’ll be treated to some spectacular vistas. There’s a chance you’ll see opossums and bobcats (though they are rare).

There are times when you’re hiking beside creeks that are dotted with beaver-gnawed gum trees.

You’ll also witness some of the world’s tallest loblolly pines.

Go for hike in the Weston Lake Loop

Take your camera and go on a photography walk at the Congaree National Park

The way the light filters through the rows of champion trees, gums, elms, and oaks here makes it an incredible spot to get out the camera and the filters.

All budding photographers passing through the Palmetto State should make a point of visiting Congaree.

The 2.4-mile boardwalk walkway is a fantastic spot to go looking for the ideal shot in the early fall mornings.

You may set up the tripod above unique fungus blossoms as it wiggles through the murky swamplands.

Alternatively, you may use the telescopic lens to focus on the shifting colors of the leaves.

In October and November, they turn beautiful shades of ochre, orange, daffodil yellow, and coffee brown.

You could be lucky enough to see the woods flooded under water during the winter.

Photographers will want to get out early again at that time.

The aqua swirls and reflects the forest’s appearance in beautiful ways with the morning light.

You may see barren trees towering against each other without a single leaf.

Like totem poles jammed into ancient swamplands, they shimmer and swing. It’s a fascinating topic to shoot.

Take your camera and go on a photography walk at the Congaree National Park

Get into the water and go kayaking

Water is one of the most popular ways to explore the depths of Congaree National Park in South Carolina.

Kayaks are ideal for traversing this flooded area.

More than any cumbersome boardwalk route, they can pierce into small inlets and wriggle nimbly between the towering pines and hardwoods.

One of the greatest spots to launch your boat into the water is Cedar Creek.

It’s tucked away in the Congaree National Park.

It’s there where the controlled Cedar Creek Canoe Trail begins. That’s a total of 15 miles of water-based fun.

Begin from Bannister’s Bridge and go through winding rivers surrounded by massive trees.

Keep a look out for otters, turtles, uncommon birds, and even the mighty crocodile as you paddle (there are a few in these parts).

If you’re not going kayaking or canoeing with a group, it’s vital to have your own gear.

This may be hired from a variety of outfitters in the area.

Local rangers, on the other hand, provide free excursions. They usually begin in April and May of each year when the weather in Congaree National Park improves.

Get into the water and go kayaking

Pay a visit to the Harry Hampton Visitor Center

This is a good place to start if you want to get a sense of the incredible biodiversity that exists in the Congaree National Park.

It’s located slightly south of the park’s main entrance, past the Longleaf Campground and the Old Bluff Road intersections.

It’s hidden in a shell of worn wood behind a forest of virgin-growth pines and gum trees, the ideal starting point for any South Carolina wilderness adventure.

Inside, you may see displays that reveal the many layers of geology, animal life, and human history that exist in this part of South Carolina.

There’s also an 18-minute film that introduces visitors to the park’s numerous natural beauties.

The center is run by dedicated park rangers and qualified ecologists.

That means there’ll always be someone there to answer your questions about those strange creatures and insects.

Pay a visit to the Harry Hampton Visitor Center

Go for a walk in the boardwalk loop

For years, the Boardwalk Loop has provided visitors with the opportunity to see Congaree’s marvels.

It is, without a doubt, the most popular hiking trail in the area. It stretches about 2.4 kilometers and passes through some of the park’s most iconic locations.

That means you’ll get to see old woods, see local animals, and get some exercise in the process.

After leaving the visitor’s center along Ancient Bluff Road, you’ll be plunged into the old coastal forests.

You’re immediately surrounded by massive tupelo trunks and hardwood trees.

Inky-black water spots may be found on both sides of the route. Insects race along the tree trunks, and water bird cries reverberate across the forest.

The Boardwalk Loop comes to a close with an observation platform overlooking a huge lake.

Photographers and animal lovers will like this location.

There will be glimpses of turtles, river otters, and canopy-shattering pine trees.

However, a word of caution: pack insect repellant!

Go for a walk in the boardwalk loop

Experience the massive Loblolly Pines trees at the park

Putting aside the Congaree’s historic forest camps and old-growth trees, marshes, and strange animals for a while, there’s something more in the Congaree that’s ready to wow.

Fans of massive plants should gather, and admirers of huge trees should be ready.

One of the world’s largest loblolly pine trees may be found here.

Splintering well above the canopy, the excellent specimen may be found.

It towers over the hickories and oaks underneath it, standing 187 feet tall.

In fact, it’s only a few meters away from the renowned trunks of the Great Smoky Mountains, putting the pine among America’s lankiest specimens.

Experience the massive Loblolly Pines trees at the park

Go for a walk in the Congaree Bluffs Heritage Preserve

On the south side of the national park, search for the Congaree Bluffs Heritage Preserve.

With its tangle of hiking routes and leaf-strewn woodlands, it butts up against the Congaree River’s courses as a state park.

This section of the reserve encompasses 201 acres and is home to hickory, oak, and tupelo trees, many of which are draped in Spanish moss.

The Congaree Bluffs Heritage Preserve’s network of observation sites is one of its best features.

They’re built on decks that look out over the Congaree River, and they’re the ideal spot for taking in the scenery.

As the huge carpet of emerald that is one of South Carolina’s largest national parks moves north, you’ll be able to see it.

You can also see the murky waves flowing eastwards towards the lakes and beaches of the Palmetto State.

Go for a walk in the Congaree Bluffs Heritage Preserve

Go for a visit at the Millford Plantation Historic Site

Have you had your fill of admiring Congaree National Park’s beautiful champion trees?

Just to the east, you’ll find a history fix. The Millford Plantation Historic Site is the perfect example.

It’s surrounded by lowland wetlands that flow off the shore of the Congaree River near Lake Marion’s north end.

At first glance, it appears to be a vision of what tycoons’ and luminaries’ rural estates could have looked like in the 1800s.

But then you go a little further and discover the slave era’s darker side.

You learn that this was formerly the home of over 600 enslaved people and was a hotspot during the American Civil War.

This somber and deep story is set against some magnificent architectural elements.

The Millford Plantation has been praised as one of the most impressive instances of Greek Revival architecture in the High Hills of Santee by experts.

Duncan Phyfe’s name is also on some of the interior furniture.

In the mid-nineteenth century, he was one of America’s most renowned interior designers.

Go for a visit at the Millford Plantation Historic Site

Go to the Poinsett State Park

If you’re planning a South Carolina adventure, the Poinsett State Park is a fantastic place to start.

To get there, head east from the Congaree National Park.

It clings to the Manchester State Forest, about 45 minutes from Kingsville.

Unlike the Congaree, the coastal lowlands of South Carolina in the Poinsett State Park fold upwards into a succession of hillocks and valleys.

As a result, they have a completely distinct topography.

And that means they have a diverse ecosystem that includes alpine flowers, Appalachian forests, and the hardwood hammocks you saw on the boardwalks to the west.

Make sure you have decent walking boots and even camping gear with you.

There are a few intriguing historic woodland campgrounds where you may pitch your tent.

There are also miles of paths to explore.

As they travel, look for them crossing rushing creeks, passing lily-strewn ponds, and passing through hickory, holly, and myrtle woods.

Go to the Poinsett State Park

Final words

Congaree National Park is a relatively new addition to the Parks system, having been designated as a National Park in 2003. People have been pushing for it to be protected since the late 1960s, and with good reason: there isn’t much swampland left in South Carolina, and with swampland comes all kinds of unique wildlife, such as luminous mushrooms, wild pigs, and canoe rides through lush vegetation. Keep these facts in mind and get the most out of what this National Park is offering.

[10 Best] Hikes In Pinnacles National Park

The unique spires of the Pinnacles emerge incongruously from the flat slopes of the Gabilan Mountains east of California’s lush Salinas Valley. Visitors explore canyons and talus caves as condors ride updrafts along the cliffs, deer graze grass near creek beds, and condors ride updrafts along the cliffs.

This serene setting is now one of America’s newest National Parks, having been elevated from national monument status in 2013. It’s easy to forget that it was produced 23 million years ago by immense geologic turmoil when molten rock erupted up between the San Andreas fault zone’s changing tectonic plates.

The region was once occupied by Native Americans from the Chalon and Mutsun tribes, many of whom died as a result of Spanish missionaries’ illness and colonization in the 1700s. The region was named a national monument in 1908, and additional paths and leisure areas were developed in the 1930s. President Barack Obama declared it a national park in 2013, designating it as a place to be preserved, treasured, and enjoyed.

Despite the fact that Pinnacles National Park is only a few hours away from where I grew up, I had never been! So, in the spirit of getting closer to home, I treated myself to a camping and hiking trip this November. To research this piece, I spent two full days trekking most of the park’s trails, interspersed by one quiet night at the campsite. It’s a difficult job, but someone has to do it!

How to get to Pinnacles National Park?

Pinnacles National Park is roughly 5 miles east of Soledad or 50 miles southeast of Gilroy in Central California.

For the most up-to-date information on fees and park status, visit the park service website.

Pinnacles National Park has two entrances: one on the west side and one on the east.

Even though both entry routes are essentially the same roadway, you cannot drive into the park from one entrance to the other (146).

Therefore, decide where you want to go based on what you want to do once you get there.

Read: Is Traveling A Hobby? The Ultimate Guide To An Exciting Way Of Life

Learn about the Downsides Of Traveling As A Hobby

Entrance from West

Take Highway 101 to Soledad and head east on Highway 146 to access the west gate.

After going through an entrance gate where payments are collected, you’ll arrive at the Chaparral Parking Area after 13 kilometers.

Take your time on this stretch of highway 146 because it is twisty and only has two lanes.

Instead, utilize the east entrance if you have a large RV or are hauling a trailer.

The west gate is only available for day usage, so don’t come here if you’re planning on camping.

It’s the closest entry to Balconies Cave and Jawbone Trail, but it’s the furthest from Bear Gulch Cave and Chalone Peak Trail.

It’s approximately as handy as the east gate for getting to the renowned High Peaks Trail.

Entrance from West

Read: A Complete Pinnacles National Park Hiking Guide [year]

Learn about Hours of Operation at Pinnacles National Park

Entrance from East

To get to the east entrance, follow Highway 25 south of Hollister for about thirty miles, then turn west on Highway 146’s brief eastern portion.

You’ll shortly reach the park entrance, followed by the Visitor Center and campsite.

Any of the trailheads accessible from this side of the park are only a few miles away from here.

The east entrance is closest to Bear Gulch Cave and the Chalone Peak Trail, a little farther away from Balconies Cave (but still accessible), and approximately as handy as the west entrance for accessing the High Peaks Trail.

The east entrance is the sole option for people who want to camp within the park.

Entrance from East

Read: What Is The Best Time To Visit Pinnacles National Park?

Alternative Routes

Other routes in the vicinity may attract you but think twice.

The sole public route crossing the Gabilan Mountains, La Gloria Road, is a single-lane dirt road that should only be traveled by individuals who are familiar with off-pavement driving.

Even if they appear on Google Maps, other roads in the vicinity are likely private and guarded.

Alternative Routes

Read: 12 Best Washington Spring Hikes To Try Out In [year]

Learn about Hoh Rain Forest Loop trail

Hiking at the Pinnacles National Park

Hiking is without a doubt the finest way to see Pinnacles National Park.

Unlike the picturesque drives and vistas, you may have seen in other national parks, the views from the road here aren’t quite as fascinating.

Only those who are ready to walk will be able to experience the greatest vistas and most intriguing landscapes.

The park’s hiking choices are restricted in quantity but not in quality, with only 30 miles of trails. Almost single path wowed me with its beauty, creativity, and variety.

Whether it’s a quick scramble through a cave or a gradual ascent to an airy vista, each walk is an adventure in and of itself.

Below is a list of the greatest hikes in Pinnacles National Park, including options for walks of various lengths and levels of difficulty.

To help you get started, here’s a trail map. Although the trails are well-marked, I continue to use and suggest the free Hiking Project app for planning and navigating.

Hiking at the Pinnacles National Park

Read: 14 Best Hikes In Denali National Park To Try Out [year]

Learn about The Gorge Creek Trail

Short hikes at Pinnacles National Park

Short walks lead to both of the park’s famed talus caves, which are passageways formed by stones lodged between the sides of small valleys.

As mentioned later below, they can also be included into moderate and long walks.

Short hikes at Pinnacles National Park

Read: [9 Best] Kid Friendly Hikes At Mount Hood

Learn about Laurance Lake trail

1. Bear Gulch Cave

This is the trek I recommend if you just have time for one short walk in Pinnacles National Park.

It loops back down to where it began, taking hikers through rock tunnels, up stone stairs, past a small reservoir, and through a beautiful area of cliffs before looping back up to where it began.

Despite the short distance, climbing steps and navigating rocky tunnels will need considerable balance and agility.

Bear Gulch Cave

Read: 8 Best Hikes In Saguaro National Park Rated

Learn about Valley View Overlook Trail

2. Balconies Cave Loop

Balconies Cave Loop is located 2.4 miles west of Chaparral Parking Area (west entrance) and 3.8 miles east of Old Pinnacles Parking Area (east entrance)

Balconies Cave Loop is the greatest option if you’re searching for a short trek from the park’s west gate.

From the parking area, a somewhat flat route goes into the jumble of rocks and cliffs.

A loop allows tourists to travel into the cave and return by a higher path, providing a fun scrambling experience as well as spectacular vistas.

Balconies Cave Loop

Read: 10 Kid Friendly Hikes In The Red River Gorge Reviewed

Learn about Tom McCall Preserve trail

3. Cave Status

The Bear Gulch and Balconies caverns are two of Pinnacles National Park’s most popular attractions, although they’re not always available.

You’ll have to go around them while they’re closed, which is generally to preserve the bat populations mating within.

For the most up-to-date information, go here.

Cave Status

Read: 10 Best Dog-friendly Hikes In Acadia National Park

Learn about Wonderland Trail – 1.6 mile distance

4. South Wilderness Trail

From the service road at Peaks View Parking Area, go as far as you wish, up to 6 kilometers out and back (east side).

For those looking to get away from the throng, this is a “honorable mention” short trek. It isn’t as fascinating or stunning as the cave walks mentioned above.

It’s a fantastic spot to discover quiet and study the flora and wildlife if you’re searching for an uncrowded trek near the campground.

South Wilderness Trail

Read: [9 Best] Hikes In Everglades National Park

Learn about Pa-hay-okee Overlook

5. Best moderate hikes at the park

The High Peaks Route, snaking through narrow ledges and rock-hewn stairs with vistas on both sides of the mountain, is the most famous trail in Pinnacles National Park.

Although the famed “steep and narrow” part is just 0.7 miles long, you may access it from either side of the park.

The High Peaks Trail and one of the two caves described above are included among the finest moderate treks in this area.

Best moderate hikes at the park

Read: [9 Best] Stroller Friendly Hikes Sedona In ([year]))

Learn about Devil’s Bridge Trail

6. High Peaks Trail via Juniper Canyon and Tunnel Trail

If heights aren’t your thing, or if you’re hiking with little children, Juniper Canyon and Tunnel trails may be used to skip the “steep and tight” part of High Peaks.

Although I’m not a huge lover of heights, I felt the granite stairs and railings were pretty safe.

Give it a shot; if you need to retreat, it’s not a long way back.

This is the quickest and most direct way to the High Peaks Trail’s “steep and tight” section.

Starting at the Chaparral parking lot, take Juniper Canyon Trail to Tunnel Trail, then back down Juniper Canyon to the famed “steep and tight” part of High Peaks.

High Peaks Trail via Juniper Canyon and Tunnel Trail

7. High Peaks Trail and Bear Gulch Cave Loop

Bear Gulch or Moses Spring Parking Areas (east entrance) are 5 miles away, whereas Chaparral Parking Area is 6.4 miles away through Juniper Canyon (west entrance)

This is the quickest route to the east gate of the High Peaks Trail, which includes the picturesque Bear Gulch Reservoir and a fun climb through Bear Gulch Cave.

For a moderate Pinnacles trip with a lot of variation, combine Condor Gulch Trail, High Peaks Trail, Rim Trail, Bear Gulch Cave Trail, and a brief stroll on Moses Spring Trail.

High Peaks Trail and Bear Gulch Cave Loop

8. Longest Hikes at the Park

Balconies and High Peaks Chaparral Parking Area (west entrance) or Old Pinnacles Parking Area (east entrance) are both 9 miles apart from the Cave Loop (east entrance).

Here is the GPS track for the Hiking Project.

This loop connects two of the park’s most popular attractions and may be accessed from either entrance.

Combine Old Pinnacles Trail / Balconies Cave with Blue Oak Trail and High Peaks Trail for a difficult loop that includes lots of rock scrambling and spectacular vistas.

The climb up to High Peaks Trail is the most difficult portion, so decide if you want to reserve it for last or face it on fresh legs first.

Longest Hikes at the Park

9. High Peaks and North Wilderness Trail Loop

From either Chaparral Parking Area (west entrance) or Old Pinnacles Parking Area, take the High Peaks and North Wilderness Trail Loop for 12.5 miles (east entrance).

This combination of the tranquil North Wilderness Trail and the sights and thrill of the High Peaks Trail is, in my opinion, the greatest walk in Pinnacles National Park if you want to avoid crowds.

The lovely North Wilderness Trail is ideal for people looking for privacy and a more natural hiking experience. Despite the fact that the path is labeled as “unmaintained” on the map, it appeared to be well-kept and simple to follow.

There were a few fallen trees to navigate, and the route is smaller and steeper than the more popular trails, but nothing too difficult.

Long pants are a good option if the bush encroaches somewhat to defend against scrapes and ticks.

Add the 2.5 mile out-and-back from Chaparral Parking Area to Balconies Cave for an immensely diverse route across most of the park’s highlights for the ultimate long Pinnacles NP walk.

Alternatively, replace High Peaks with the Balconies Cave Trail to save around three miles and avoid the “steep and tight” portion of rock stairs and railings.

High Peaks and North Wilderness Trail Loop

10. Chalone Peak via Bear Gulch Cave

8-12 miles from Moses Spring Parking Area to Chalone Peak through Bear Gulch Cave, or somewhat farther if parking is full. 

This out-and-back walk to Pinnacles National Park’s highest point is a wonderful opportunity to get some kilometers in while avoiding the crowds.

On the way out, you’ll pass through the renowned Bear Gulch Cave and reservoir, giving you a taste of the park’s iconic trails, before continuing on a quieter route for many miles of steady ascent and panoramic vistas of the surrounding hills.

The summit’s viewing tower is an excellent spot for a food stop, and there’s even a pit toilet if you need it.

If you haven’t had enough, a clear but less well-maintained route continues sharply down and up to South Chalone Peak, 1.6 miles distant.

Chalone Peak via Bear Gulch Cave

Final words

Take a look at these hikes and go ahead with the best hikes based on your preferences. Hiking poles are not required. More information on when hiking poles are (or aren’t) useful may be found here. They aren’t necessary for the types of trails found in Pinnacles NP, in my opinion, unless you have an injury or a balance problem. On the rough scrambles of the cave routes and High Peaks, you’ll want the ability to fold them up and connect them to your pack so you can keep your hands free.

When hiking at Pinnacles National Park, remember to Leave No Trace, as you should whenever you’re out in nature. Because the trails attract a large number of people, even minor errors can quickly pile up. The most essential things you can do to help future visitors enjoy the park are to leave no litter behind, remain on the paths to avoid erosion, and resist the impulse to feed animals or carve graffiti into the area’s famous rocks.

[9 Best] Stroller Friendly Hikes Sedona In ([year])

Sedona, with its towering cliffs and breathtaking red rock vistas, is a hiker’s dream. With its breath-taking landscape and enthralling natural treasures, provides limitless chances for adventure for the entire family.

While the city appears to be built for hardcore outdoor adventurers, there are plenty of easy and family-friendly hiking routes to be found. Let’s take a look at some of the most prominent stroller friendly hikes that you can discover in Sedona during 2021. All you have to do is to go through this list of stroller friendly hikes and pick the best one. So, grab your hiking boots and head out on one of these family-friendly Sedona treks.

1. West Fork Trail

West Fork Trail, located in Oak Creek Canyon, is unlike any of Sedona’s other well-known climbs.

You’ll have to cross West Fork Creek several times on this hike, passing through magnificent rock formations.

The route also offers lots of tree protection, water, and shade, making it an ideal Sedona walk for families.

Hike this family-friendly path to take in the revitalizing views of the canyon’s red cliffs, greenery, and creek.

Your children will enjoy observing the beautiful green paths, which will transport you to New England.

There are 13 different and enjoyable creek crossings on the path, which will provide an element of excitement to your family excursion.

This Oak Creek excursion is a great walk in Sedona for youngsters ages 6 and older, thanks to its shaded parts and 3.5-mile roundtrip route.

Sedona Rouge Hotel and Spa Trademark Collection by Wyndham is a nearby hotel that is recommended.

West Fork Trail, located in Oak Creek Canyon, is unlike any of Sedona’s other well-known climbs.

You’ll have to cross West Fork Creek several times on this hike, passing through magnificent rock formations.

The route also offers lots of tree protection, water, and shade, making it an ideal Sedona walk for families.

Hike this family-friendly path to take in the revitalizing views of the canyon’s red cliffs, greenery, and creek.

Your children will enjoy observing the beautiful green paths, which will transport you to New England.

There are 13 different and enjoyable creek crossings on the path, which will provide an element of excitement to your family excursion.

This Oak Creek excursion is a great walk in Sedona for youngsters ages 6 and older, thanks to its shaded parts and 3.5-mile roundtrip route.

West Fork Trail

Read: Is Traveling A Hobby? The Ultimate Guide To An Exciting Way Of Life

Learn about Reasons why traveling is A hobby

2. Baldwin Trail

Another prominent stroller friendly trail that you can discover is the Baldwin trail.

Baldwin Trail is one of our favorite kid-friendly treks in Sedona.

It not only has a small height increase, but it is also only 2 miles long.

Even better, there are lots of trees along the walkway to give shade from the scorching sun in the afternoon or early.

Enjoy this trek in Sedona at your leisure.

This Sedona trek will not disappoint you with its vistas of red rock and desert landscape.

Furthermore, this hiking Sedona trip provides breathtaking sunset views of the renowned Arizona highlands.

This walk in Sedona; Arizona is appropriate for children aged 3 and above.

Just remember to take the appropriate steps to protect your children from the sun in the desert.

This Sedona hiking trail is generally open, so keep that in mind. Nearby Hotel Recommendation: Hilton Sedona Resort at Bell Rock

Baldwin Trail

Read: Is Devil’s Bridge Dangerous?

Learn about Is Devil’s Bridge suitable for children?

3. Bell Rock Trail

Looking for easy, family-friendly hikes in Sedona if you’re traveling with a baby?

This picturesque road is the greatest option for parents searching for stroller-friendly treks in Sedona, Arizona, thanks to its level landscape and nearly minimal elevation increase.

You will never encounter any challenges as you go ahead with this stroller friendly trail.

The Bell Rock Trail is only approximately a mile long.

The walk also offers spectacular views of Courthouse Butte and Bell Rock.

Take the longer and more difficult walks in the region if you’re looking for more red rock trekking.

Bell Rock Trail is a simple and enjoyable nature hike for kids of all ages.

Nearby Hotel Recommendation: Sedona Summit by Diamond Resorts.

The Bell Rock Trail is one of the greatest stroller-friendly treks in Sedona, making it one of the top things to do in Sedona with a baby.

The Bell Rock Trail is a short Sedona trek that takes you around Bell Rock and Courthouse Butte, which are widely regarded as two of Sedona’s most stunning rocks.

There are numerous walks to select from the Bell Rock trailhead, but the Bell Rock Pathway Trail is the most popular owing to its spectacular views of Bell Rock.

The Bell Rock Trail, which is about a mile long, is one of Sedona’s short walks.

It’s mostly flat, with almost little height increase, so you can see Bell Rock and Courthouse Butte the entire way.

If you’re going hiking with a stroller, choose one with bigger wheels that can withstand a gravel route with a few pebbles thrown in for good measure.

Because of the red shale gravel on the trail, anticipate your child to become muddy if you’re hiking with them.

Despite the presence of a few trees, this trek is primarily exposed to the sun, so take precautions to shield your infant from the harsh Arizona heat.

Bell Rock Trail

Read: 12 Best Washington Spring Hikes To Try Out In [year]

Learn about Hoh Rain Forest Loop trail

4. Devil’s Bridge Trail

Don’t be put off by the name! The trail is straightforward, especially if you’re a frequent hiker, with a 400-foot elevation increase.

Furthermore, with a length of about 4 miles, it is a relatively short yet picturesque trek.

And, best of all, the route will bring you to the Devil’s Bridge, one of Sedona’s most iconic and breathtaking vistas.

One of Sedona’s most photographed and Instagrammed sights will captivate you. Snap a walk on the natural bridge and take a family portrait there if you’re feeling daring.

However, use particular caution when crossing the bridge. Even though it is safe and broad, there is still a chance of falling.

As you go through this sandstone arch, keep a safe distance from the brink.

The walk in Sedona, Arizona is appropriate for youngsters aged 12 and above.

If your family has worked up an appetite while hiking, check out the finest family eateries in Sedona, AZ.

Devil’s Bridge Trail

Read: Is Devil’s Bridge Dangerous?

Learn about Is Devil’s Bridge suitable for children?

5. Fay Canyon Trail

Fay Canyon Trail is one of the easiest and kid-friendly treks in Sedona, with only a 190-foot elevation increase.

This family-friendly 2.4-mile journey takes you deep into the heart of Sedona’s red rocks, passing by hanging gardens and stunning canyon walls.

Your kids will have a joy climbing on the rocks at the end of the trip.

Fay Canyon will be one of the popular paths in Sedona for kids aged 6 and above.

Nearby Hotel Recommendation: Hyatt Residence Club Sedona, Pion Pointe.

The simple Fay Canyon Trail, which is an excellent alternative to the popular West Fork Trail, is another gorgeous canyon walk.

One of our favorite kid-friendly hikes in Sedona was this one.

The Fay Canyon Trail, located 10 minutes northwest of Sedona, goes into a magnificent red rock canyon with a natural stone arch.

The path to the Fay Canyon archway is a branch off the main trail, however it is not well signposted and difficult to locate.

There are numerous side routes to select from; the proper one is indicated by rock stairs, while the erroneous ones are obstructed by tree limbs and other obstacles.

The trail to the arch is short, steep, and difficult, but the views of the canyon are well worth the effort.

The arch itself isn’t that impressive, so skip it if your family isn’t ready for a strenuous hike — the canyon is the true star of the show.

Fay Canyon Trail

Read: 14 Best Hikes In Denali National Park To Try Out [year]

Learn about The Gorge Creek Trail

6. Sedona View Trail

Sedona View Trail is one of the best and most popular child-friendly walks in Sedona, with level trails and a roundtrip distance of 1.2 miles.

Hiking this path will provide you with spectacular views of Chimney Rock, Coffee Pot Rock, and Thunder Mountain.

Allow your children to explore and play on the trails, which are both safe and kid-friendly.

Because it’s a well-known vortex location, I recommend taking some time to meditate with your kids before returning to the hike’s starting point.

The Sedona View Trail is an excellent trek for kids of all ages. Nearby Hotel Recommendation: Sedona’s Sky Rock Inn.

We can highly recommend this to you as a stroller friendly trail in Sedona.

This climb, which starts at the airport parking lot, is also fairly near to town.

This short trek in Sedona provides panoramic views of the town and the surrounding red rocks to the north.

On this trek, the tree cover will not provide much shade from the blazing heat.

A stroller with large wheels might be used, but owing to the limited path and numerous boulders, a baby carrier is definitely preferable.

Sedona View Trail

Read: [9 Best] Kid Friendly Hikes At Mount Hood

Learn about Laurance Lake trail

7. Cathedral Rock Trail

To be honest, it’s not as simple as some of Sedona’s kid-friendly treks.

What’s more, guess what? With its ethereal views, it can provide energetic kids and teens with a once-in-a-lifetime trip.

On your family’s nature walk to this rock, appreciate and experience the good energy released by its well-known vortex.

Take in the vistas of the undulating desert landscapes to the west once you’ve reached the saddle.

Don’t forget to photograph the Mogollon Rim, Bell Rock, Thunder Mountain, and Courthouse Butte, which are all brightly colored.

Because certain portions of the route are a little tricky and steep, it’s best suited to teens aged 15 and up.

However, you may also try this as a stroller friendly trail. Nearby Hotel Recommendation: L’Auberge De Sedona

Cathedral Rock Trail

Read: 8 Best Hikes In Saguaro National Park Rated

Learn about Valley View Overlook Trail

8. Huckaby Trail

Taking a family trek on Huckaby Trail is one of the greatest and simplest ways to experience the picture-perfect Sedona rock formations with your kid.

Even though the trail is rough and rocky, a baby carrier will suffice for this nature excursion.

The route also provides some shade for your little angel from the scorching Arizona heat thanks to the abundance of trees along the way.

The route will lead you to Oak Creek, with views of Uptown Sedona, “Snoopy,” and “Lucy.”

Make your stay even more memorable by crossing the stream and trekking to Midgley Bridge, which offers postcard-worthy views.

This Sedona, Arizona walkway is appropriate for children of all ages.

Best Western Plus Arroyo Roble Hotel & Creekside Villas are two nearby hotels that are recommended.

This simple trek, conveniently located only minutes outside of Sedona, provides wonderful views of the town and the area’s signature towering red rocks in the background.

The Huckaby Trail is too rough and uneven for any type of stroller; therefore, a baby carrier or wrap is required.

Huckaby Trail

Read: 10 Kid Friendly Hikes In The Red River Gorge Reviewed

Learn about Tom McCall Preserve trail

9. Baldwin Trailhead via Red Rock Crossing

Red Rock Crossing is one of our favorite family-friendly places in Sedona, with flat, welcoming red rock portions, lovely creek parts, and grasslands.

It also contains old trees that give shade for family picnics and offers stunning red rock mountain vistas.

Visit this Sedona destination before sunset to make your trek more enjoyable.

You and your children will love seeing the light fall on the magnificent red rocks in the foreground, which are framed by tall trees.

Because you’ll have to cross a river to get there, getting there may be a lot of fun.

This trek in Sedona is easy enough for kids of all ages to complete.

After all, it has an overall length of less than a mile and an elevation increase of less than 50 feet.

Hit the Cathedral Rock path and trek all the way to the crossing if you’re seeking for a more strenuous nature hike.

Baldwin Trailhead via Red Rock Crossing

Read: 10 Best Dog-friendly Hikes In Acadia National Park

Learn about Wonderland Trail – 1.6 mile distance

Final words

There are numerous enjoyable activities to do in Sedona with kids, but without a doubt the greatest are the kid-friendly hikes. Exploring Sedona’s stunning, towering red rocks is a blast for kids of all ages. Sedona, Arizona is one of the greatest places in America to introduce your children to nature. It was voted America’s Most Beautiful Place by USA Today because of its breathtaking landscape. Take a look at these trails and go for the best one out of them based on your preferences.